aclark79
-
Innehålls Antal
35 -
Gick med
-
Besökte senast
-
Dagar Vunna
12
Innehållstyp
Profiler
Articles
Media Demo
Forum
Bloggar
Kalender
Galleri
Filer
Butiken
Allt postat av aclark79
-
You guys are awesome. I will get my multi meter out and test the outlets soon. There are 24v ports on the front, 3 in fact, one at the rear right tail light and one on the dash. If there are any others I haven't found them. I haven't found a port yet where the radio would have been, but I haven't looked very hard back there either. When you translate rear light, would that also be break light correct? We would normally say back up light instead of reverse light, but it makes complete sense. I am not familiar enough to know the electrical system yet, so I'm looking at the write up and think the diff lock fuse is for both diffs and the front wheel drive controls the action of the vacuum for the 4x4? One fuse does the light in the lamp, one does the actual 4x4 engaging? What is the magnet valve? That's the part that causes the fail safe 4x4 to disengage right? Thanks again all.
- 8 svar
-
- 1
-

-
Now the repaint. So I decided to have the truck sanded... would I do it that way again, yes, but I would have gotten more prep in to keep sand from getting everywhere.... The smaller parts I had sand blasted at a powder coating company and most of them I painted and some I powder coated. A lot of prep work, but I made the mistake of using too thin a cover for the interior, which then pulled away from the tape that I used. Ah well, live and learn. The sanding did a great job, just a ton of it left afterwards. I took most everything off, but not the bar for the machine gun. It was mounted on to solid and I couldn't get leverage to it without first taking out all the fused and other electronics, same with the windshield wiper motors. In the end it was a nice shiny truck with metal ready for primer. I think long term it was a good choice although on the facebook group one guy disagreeded strongly with the decision. Feel free to berate me here if you also disagree! I didn't get any pictures as I primed it, I needed to get it on that night and it was one of the few good days before the rain was coming. I got a good coat of primer on it the first day, then put another coat on the second day, then touched that up that day. Each day's session took the time it took to put on, then the whole night to let it cure enough to move on. I used Gillespie NATO GREEN CARC Substitute. That's the same as US Army green, like modern humvee's and tanks, but without the anti-chemical warefare coating. The real CARC (chemical Agent Resistant Coating) paint is really really really toxic when it's applied before it's dried. Like kill you quickly with nasty cancer type. You apply it with a full breaking apparatus and hazmat suit. Plus you can't buy it legally anyway in the US. So Gillespie makes a fantastic series of paint designed for military vehicles with the colors from WWII through Korea, Vietnam and modern US Army. I would have liked to get the Swedish Army green, but sourcing that into the USA wouldn't have been easy. This picture, before the paint has cured at all, shows it to be pretty light. I was a little worried that it wasn't going to get darker like the sample, but it did cure well and turned darker. I put two coats on, but a few places were too light and the paint didn't stick as well. It's great for this winter, but I am holding off adding the decals and grip tape until I can put two more coats on. I used a propane heater in my garage all night to keep the temp up and let it cure. Sand. I will have sand for the next 20 years, I have just accepted it as a fact. The sand got into the door lock and I couldn't open the door. I had to take the hinges off and the use a crow bar to grab the release lever. It works now, it just needed cleaning all the gunk out. You can really see a difference in the shades of green here although this is pre darkening green on the upper half. Eventually I'll pain the whole inside as well. These photos are the truck now with the darker green. I did add new headlights, they work great. I'm an idiot and blew my relay so that took some work. Right now the truck's running lights won't turn off if the battery is on. I did have a blackout light connecter that was loose, but as far as I can tell right now everything is connected and I don't know why it's not working. I did have to replace the 150a relay, it was fried. All my other relays have been swapped for new ones on the right side of the truck. The left side ones haven't been changed out. The backup light isn't working and the hazards will only flash if the headlights are in the first position. Otherwise everything else is working (and it worked perfect before I fucked with it). I also replaced the broken front right defroster scoop. I'm super happy with the truck, it 4x4s like a dream. The low range is amazing at pulling through stuff. I've never needed to lock the dif's yet... that day will come. Things to do are : Add a winch Add one smaller LED light bar to the front Add a CB/HAM radio and radio antenna 2 more coats of green paint Replace all the decals change out the rifle racks in the back Add grip tape back Clean up and repaint the interior Drop the fuel tank and clean and de-rust it Add the refurbed carbs back once the fuel tank is cleaned. Clean and paint the rims Get a better spare tire mount system in place Add a jerry can holder to the spot where the fire extinguisher box was. Get the cover fixed, the clear parts need replacing and some of the tie down leather is junk and doesn't work and the stretch cords are worn and it has a couple small holes. Get a bikini top (top covered but no sides) for summer.
- 32 svar
-
- 15
-
-
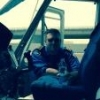
So, I'll post here in this thread some of the pictures I've put up on the Portal Hub, so everyone can see the process! I bought the truck from Bacht Int in Denmark who purchased the truck at auction from the Swedish Army. You can see the truck being prepared for shipping here. The truck was then driven to Bremerhaven in Germany where it was loaded on the MV Asian Vision (a ro-ro ship) and then made the slow passage to Tacoma Washington. It took over 30 days for the ground shipper to arrange to get the truck, missing the first cruise of the ship, so add another month, then the ship takes 30 days to make it to the USA's west coast... so about 3 months from purchase till it arrived in the USA. Customs wasn't hard, it just took a few hours to get the truck, I then had all the fluids changed and the batteries checked plus a quick tune up before heading south on the interstate from Tacoma to Portland. It drove great, holding about 65-75 km/hr the whole way. One of the CV boots was badly damaged and it was leaking fluid, but I kept stopping every so often and checking the levels / adding fluid and it had plenty of fluid so no worries. The engine ran great and other than being passed all the time on the freeway it was a good trip. Fluids and parts in preparation for the trip. I got hearing protectors, but didn't end up needing them. An orange warning flasher for the freeway since I was going to be slower than regular traffic. I'm glad I had it, no issues popped up there. It wasn't required, but made good sense. Greased all the fittings, changed the fluids and it was good to go! Poor quality picture unfortunately, I blame my dad. This was just before starting the trip from Tacoma to Portland. I was so excited to pick the truck up from Customs at the port that I didn't take a picture... duh.... The dash on the start of the drive. You can see how faded the mud guard is. The truck was in excellent shape overall, but lots of chipped paint and exposed primer and a lot of surface rust. First stop getting gas and checking the leaking CV boot. I should restate that the boot was leaking, but at a very slow rate once I topped off the level of the CV. It did give me a minor heart attack at first though and I had to go to the local auto parts store to buy a socket big enough to take the access bolt off! You can also see alot of the exposed primer and surface rust. This is a good before picture. The paint was pretty faded as well as I discovered later when comparing exposed sections to covered sections. At this point the windows would not fold down, nor the roll bars, due to rust. Yeah, 57 mph! Moving fast! I cruised at about 58-60 mph the whole trip unless it was a long hill when she slowed back to about 45-50. Temps stayed right around 85-90c, that engine driven fan pulls a lot of air. If Goteborg and Gothenberg are two ways to spell the same city name then I've been there in High school on a Rotary exchange and loved it. If not, ah well, something to add to my list of places to go. I loved Sweden, I've been 3 times now, the last two were both in winter and I want to go back in the summer please! Anyone know how to track down what unit this truck was assigned too? It even came with an axe! Lots of surface rust in the usual places. Next summer I want to take apart the dash and get behind that fire wall and do big cleanup and rust prevention, but I'm a little scared to take all that apart.... The wet spot on the roll bar hinge point is anti-seize anti rust and worked great, every day I'd spray some in there and it didn't take too long for the joints to all free up and everything moves pretty smooth now. Came with the machine gun mount. As an American of course I have a belt fed semi-auto machine gun, so I'm going to get an adapter made and mount it here. My neighbors son, testing out the gun placement. Still needs an adapter. Came with the metal grating and you can see the rifle mounts. I will take those off eventually and change them out for something else. Also you can see the scratches from use, no biggie, I've already painted over those. Eventually I will repaint the entire interior as well. Same thing here, came with the mounts, the GPS mount and the like. I had to ask around to find out what these things were for and I still don't know what a lot of the straps and small compartments were intended for. A good picture of the before state. There is rust, exposed primer and chipped paint coming off the coating. I started out with a grinder, grinding off the rust, also thinking some of the primer was rust... what I discovered was that I was going to end up with a bunch of polished metal from the grinder which isn't good for painting. After a long thought process I decided to have the truck sand blasted and repaint it myself. This would take off some of the anti-rust zinc finish, but I think in the long run it will be ok since I used Red Oxide III red primer which has anti-rust properties by design and is the primary US and NATO military primer. Lots of little things, the mud flaps are ripped, the grip tape was coming off, springs are broken on the roll bar support pieces, etc etc, nothing major and nothing insurmountable. While there was a lot of minor surface rust, nowhere was it rusted through, the floors are great, the undercarriage looks very solid and while I have a project this summer to clean the undercarriage and give it a good coating, it's in great shape. It took a while before I was able to get the roll bars to fold and at this point the windshields would not fold into there channel, that took a bit more work and a rubber mallet and some pounding to break the rust. I was pretty happy at this point though knowing that the roll bars would fold properly. Taking it for a ride without the top or the windshield give me cool guy hair! So this is the first fuck up. I was unscrewing the bolt and it was seized and I wasn't being patient and it snapped. I was able to swap the windshield wipers so the other one screwed down (enough was left) and I have a replacement on the way from Sweden, but I'll have to get the broken part out before I can use the other wiper arm... ah well, it taught me a lesson. Trying to stay orginized. Of course I still misplaced some screws and bolts! I ended up taking most of these in to a great company here called Tacoma Screw who matched and swapped everything for new bolts, washers, nuts and screws. I didn't do it for every part, but the majority which gives me good parts to work with. Then it was on to fixing the CV boot. My friend in town has a C303 and has done a lot of work on it and he had a spare boot. We examined the damage, it was both sides. I'm thankful it didn't leak more and surprised it kept the fluid in, but it did... when we pulled it off a bunch of fluid drained out the shaft. Didn't have the bucket in the right place and it was pouring outside so working inside the garage... not ideal, but it gets the job done. Running pretty well, I took it to a good Volvo shop here in town, they have worked on these types before. There is a guy in town with an earlier TGB 1111 (the rifle version) so it's weird that there are 2 in town when there are so few in the world. My carbs were leaking gas badly, so they put some loaner carbs on while I've been getting new (refurbed) carbs to put back on. It's been running rough with those loaners. I also got the windshields replaced. My renter accidentally broke one... and I wanted to change the rubber gasket replaced anyway... so I drove it for a little bit without the windshield... oh man that's cold. This picture is right before painting. The other truck at the shop.
- 32 svar
-
- 5
-
-
SweMob, that is exactly what I am looking for in an electronic format, I didn't see it in the link of manuals. I am fortunate enough that a friend has located a physical copy and will send it to me.
-
Yes, they are the Truck Lite 7" LED's. They are plug and play and work great. I am a dumb ass and when I was plugging them back in the last time (after testing and painting) I had the key on and it blew the 150a relay so they didn't work. Thankfully now they are working and put out more light. I am keeping the originals in a safe storage place and they can go back on if needed.
- 32 svar
-
- 3
-
-
I still want to do a 2nd coat of paint for the areas that didn't get enough or it didn't stick well enough. Overall it's great though! I also want the 2nd coat before putting any of the decals or grip tape back on.
- 32 svar
-
- 10
-
-
So... google translate has failed me on trying to translate the fuse block on my TGB1111. Would someone be willing to translate the two pictures attached? Thank you! The truck is doing well, very happy with the paint job overall, but I really want to do another coat when it stops raining all the time, before adding the decals back on.
-
Your 1111 looks great, I hope to get mine as clean looking as that!
-
Hello! Here is my TGB being picked up for transport to the USA. It will take about a month to get to the US via Ro-Ro ship. It's a 1975 with a little over 2000 km on it. I've very excited, it will be a one of a kind over here. I'll keep lurking here although translation is a little cumbersome, this site is a wealth of information! Edit edit: Sten rightfully moved these pictures and posts here, I didn't realize that the other thread was for a picture or two. I apologize! It's a little difficult google translating the Swedish, I will use this thread instead! edit: I've got copies of the english translated parts guide and the basic manuals. Is anyone aware of a TGB 1111 specific manual? There must have been a Swedish Army manual that at least addressed the differences and the operation of the recoil-less gun and later the missile launcher. I've always seen my model of truck referred to as an 1111, is there a different nomenclature used?
- 32 svar
-
- 18
-