Costin Moga
-
Innehålls Antal
150 -
Gick med
-
Besökte senast
-
Dagar Vunna
14
Innehållstyp
Profiler
Articles
Media Demo
Forum
Bloggar
Kalender
Galleri
Filer
Butiken
Allt postat av Costin Moga
-
Sugga #443
ämne svarade på Costin Mogas Costin Moga i Volvo Sugga/TP21/RAPTG 915/Volvo 912 och TL-varianterna
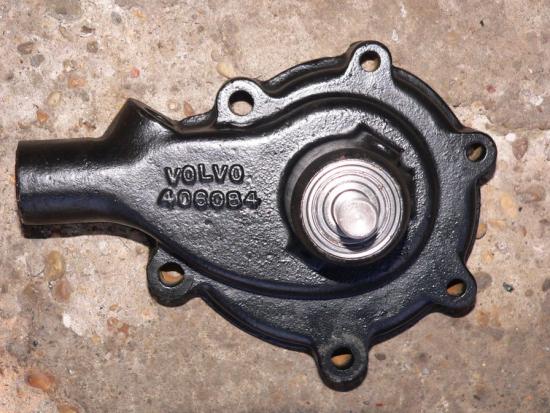
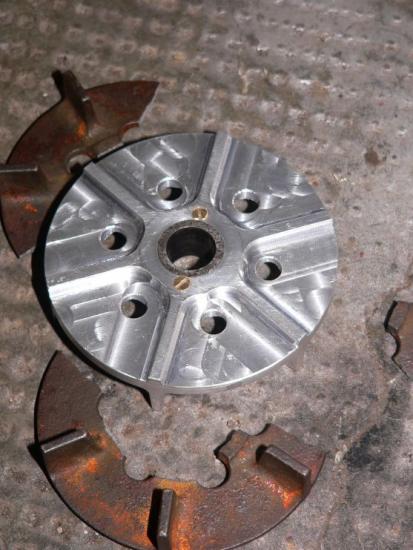
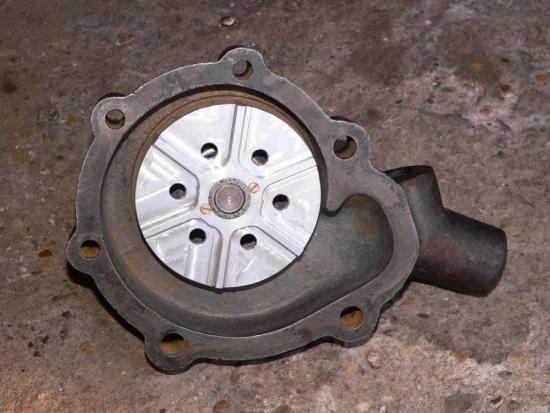
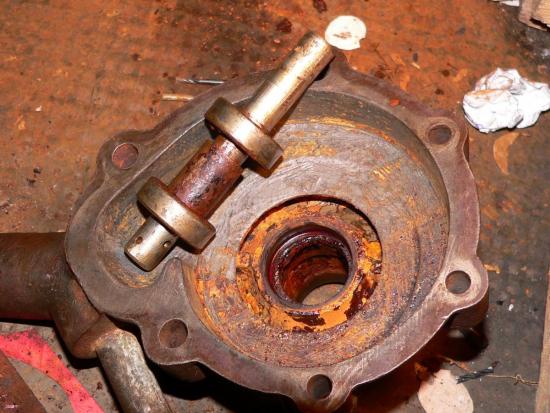
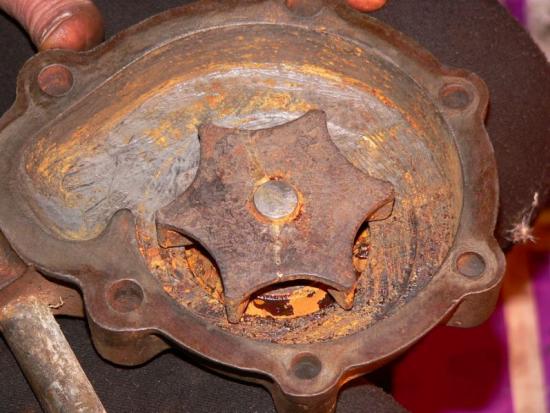
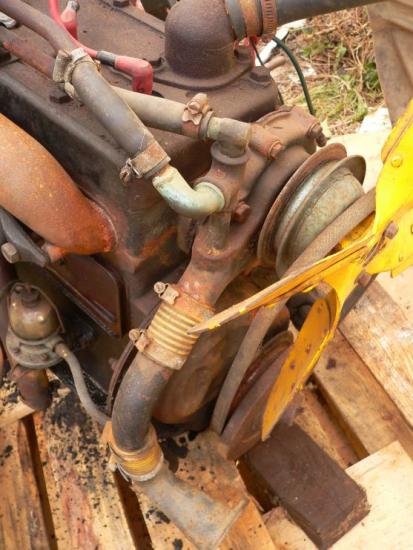
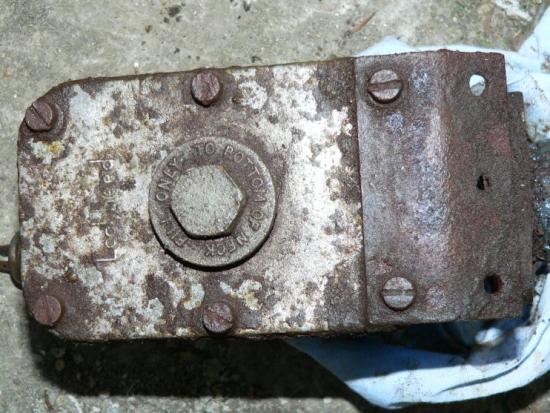
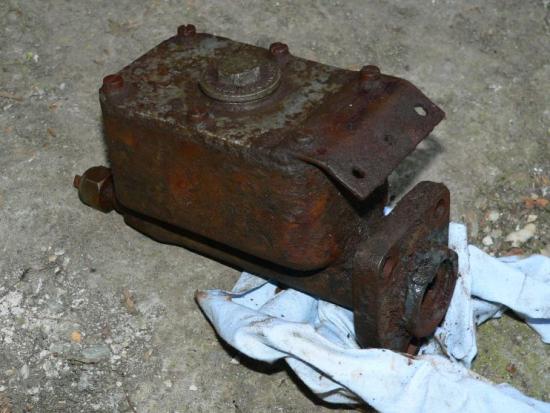
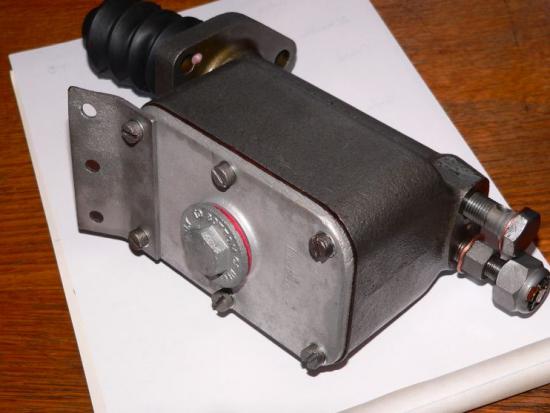
ENGINE WATER PUMP Another difficult piece. Although it looks simple, it was a paint in the *** to rebuild. First, as I said before, it was rebuild at one time using another impeller, I believe from a LandRover. Very poor rebuild - the impeller was way much smaller, probably not pushing enough water through the engine and not cooling it. I ordered an original part from ALTYCO, but they only had one pcs 'used but good'. Well, that's what we get, that's what we have to use... But when mounting it, it broke (remember it has to be tight fit on the shaft). Old cast iron gets very breakable ! So we had to send the broken part to the turner and he made a new one from aluminum. Not only it will not rust, but it's much lighter too, therefore less momentum. We ordered him a new shaft as well. New bearing was installed. New water seal (ALTYCO). Have a look at last picture - we made the impeller slightly larger compared to original for a tighter fit to casing wall. Done. Use of the vehicle showed water pump is good, cooling the engine to 80 - 84 degrees max in hottest summer. Some leaks in first 800-1000 km by the water seal. Mechanic told it will leak untill the new surface on which the water seal presses will get smooth enough to seal the water. It's exactly what happened. Now - no leaks !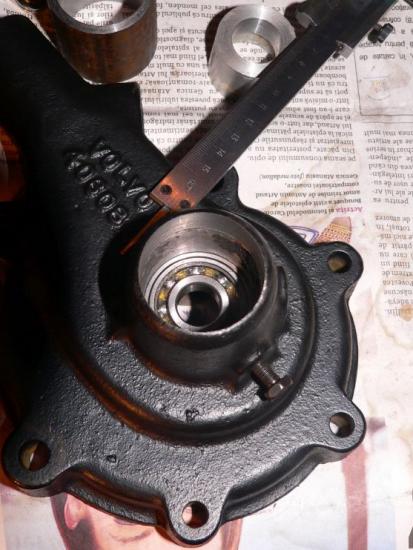
- 118 svar
-
- 4
-

-
Sugga #443
ämne svarade på Costin Mogas Costin Moga i Volvo Sugga/TP21/RAPTG 915/Volvo 912 och TL-varianterna
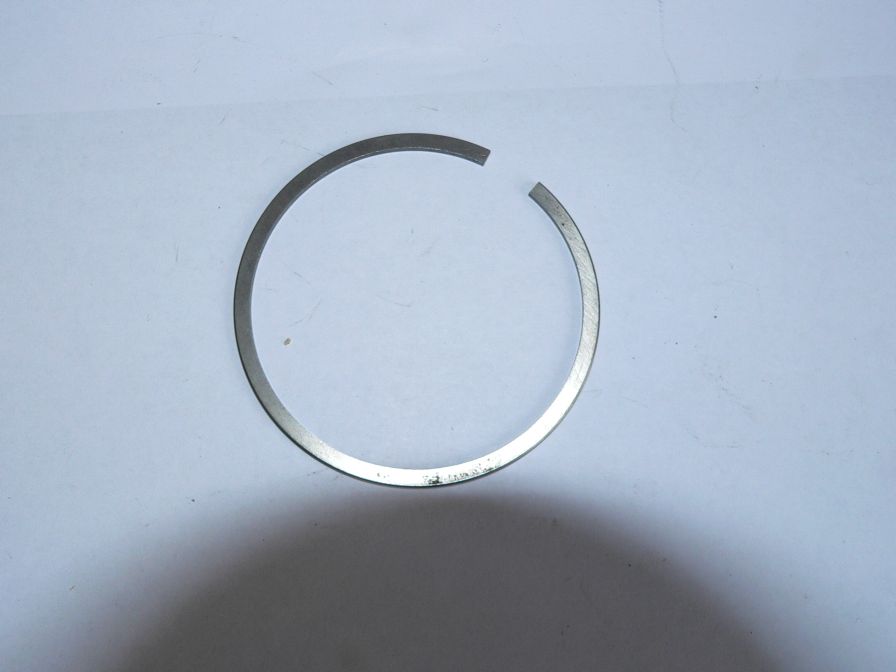
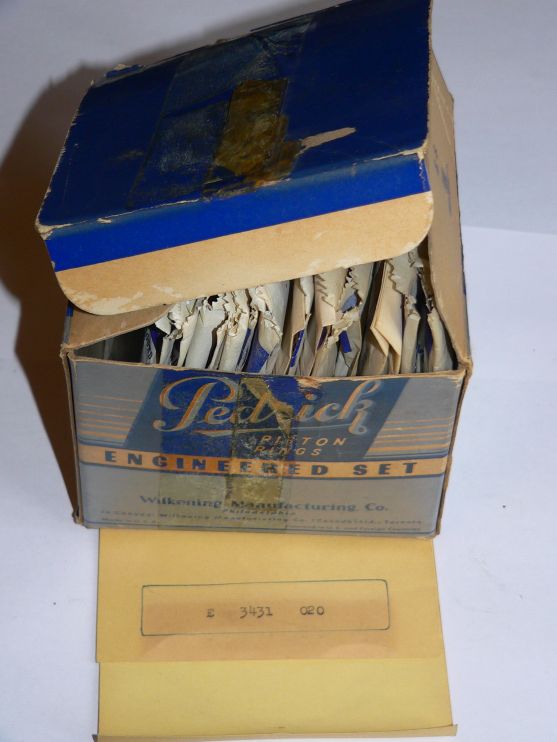
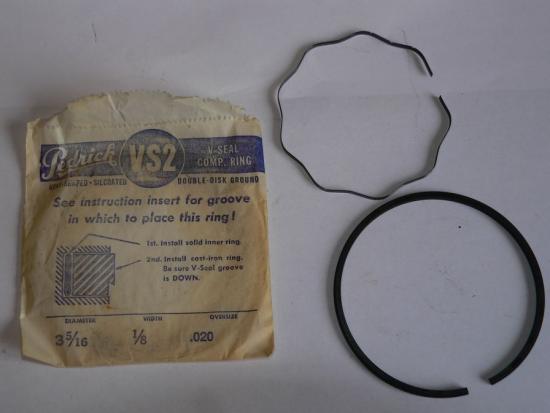
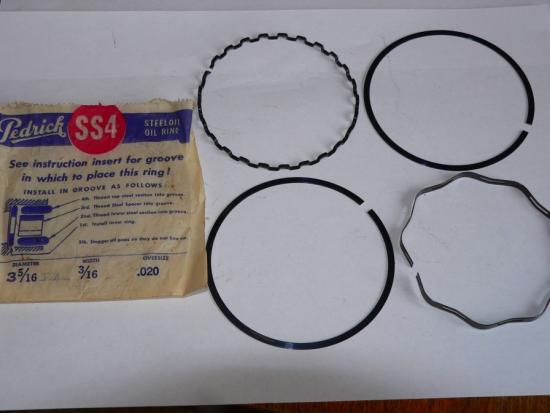
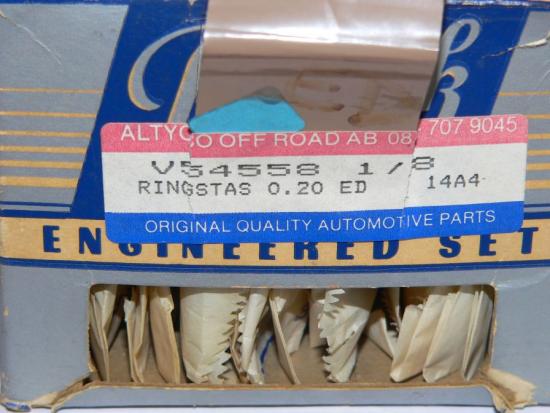
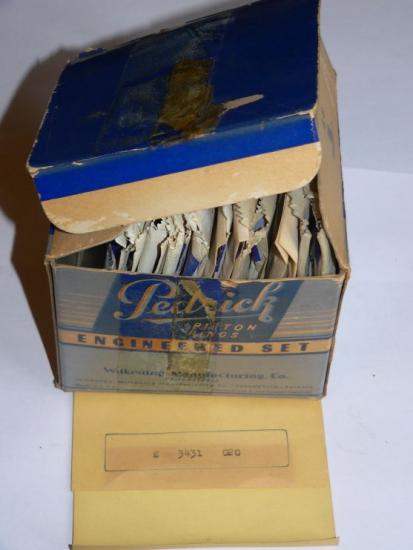
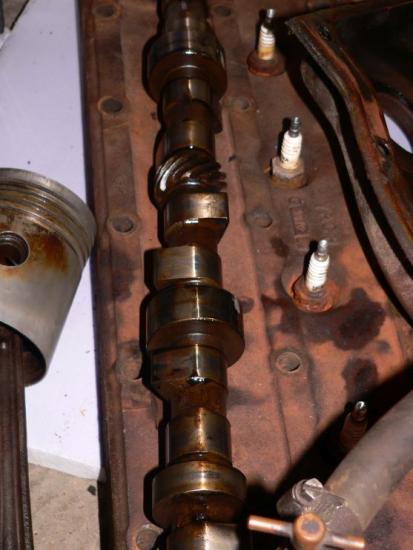
ENGINE Piston rings These were also impossible to find. We had to order (ALTYCO and an old seller from UK) oversize - 0.20 (repair step one). Remember cylinders were impossible to find oversize. Well, rings were impossible to find not oversize !!! Fitting oversize rings is to be done by grinding their edges to get a certain dimension of the gap. Mounted and checked with light underneath. If no light passes, we're good to go. One ring (the fire ring if I remember well) was purchased from an old seller in UK who told me it was from a Bedford truck. If you were wondering where from 84.14 mm comes from (cylinder diameter), there you have the answer on the Pedrick rings package - 3 5/16 inch.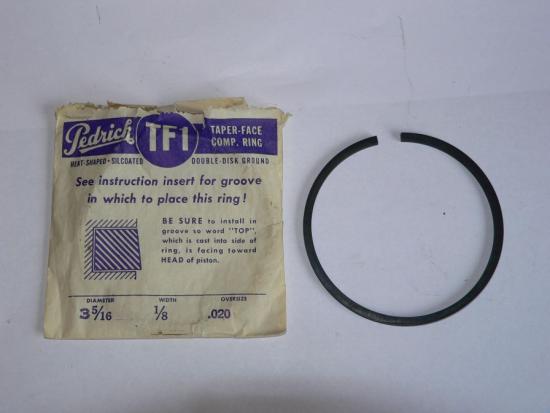

- 118 svar
-
- 1
-
-
Sugga #443
ämne svarade på Costin Mogas Costin Moga i Volvo Sugga/TP21/RAPTG 915/Volvo 912 och TL-varianterna
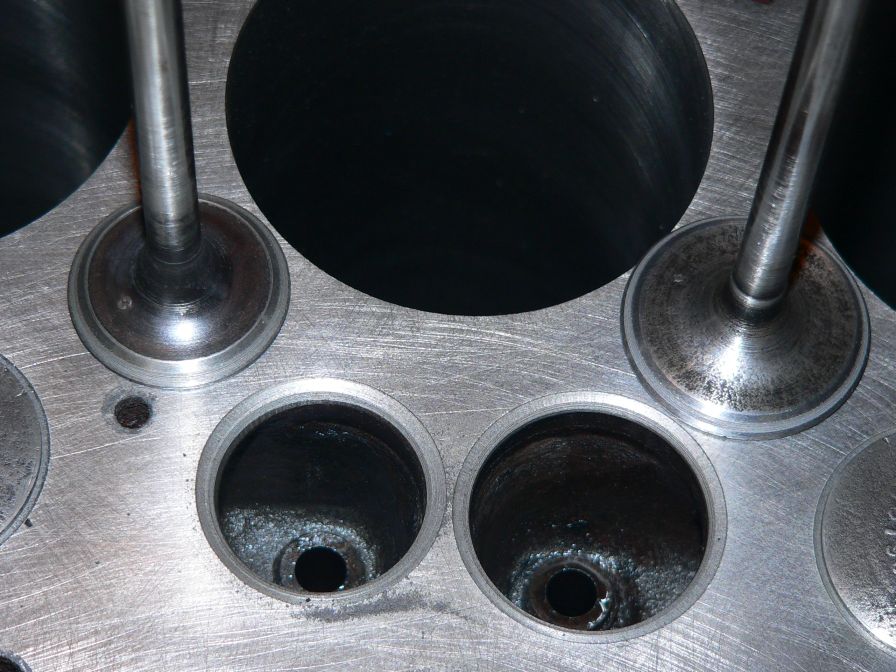
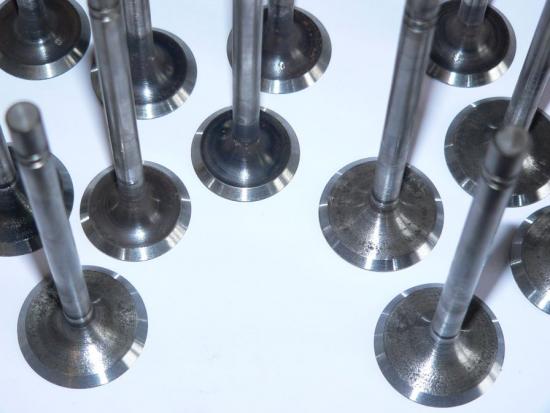
ENGINE Valves and valve seats. Both were remachined to factory specifications.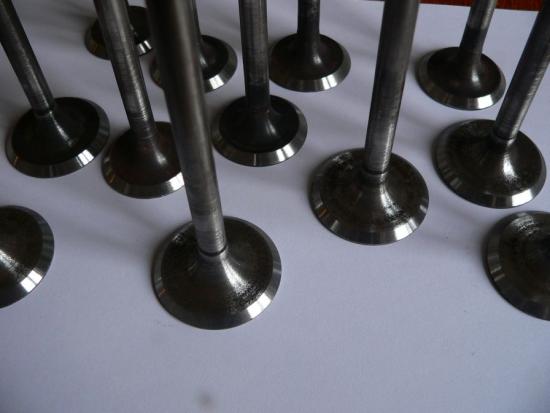

- 118 svar
-
- 1
-
-
Sugga #443
ämne svarade på Costin Mogas Costin Moga i Volvo Sugga/TP21/RAPTG 915/Volvo 912 och TL-varianterna
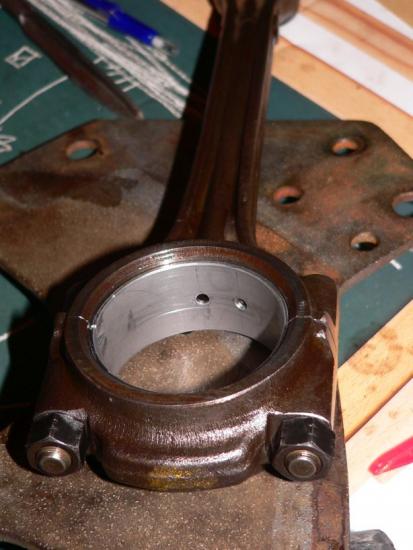
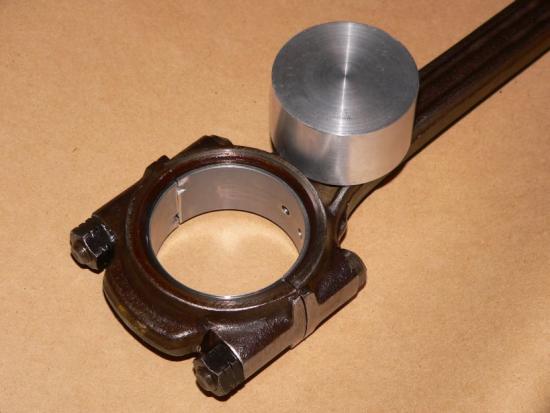
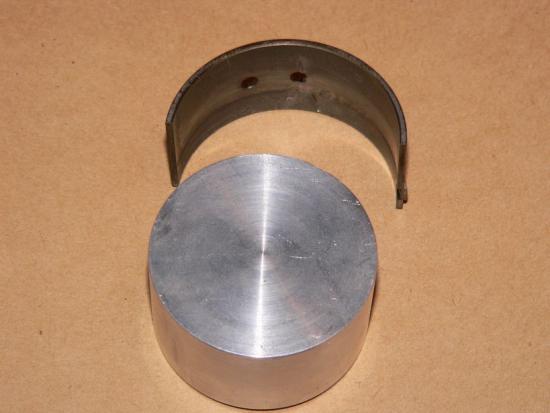
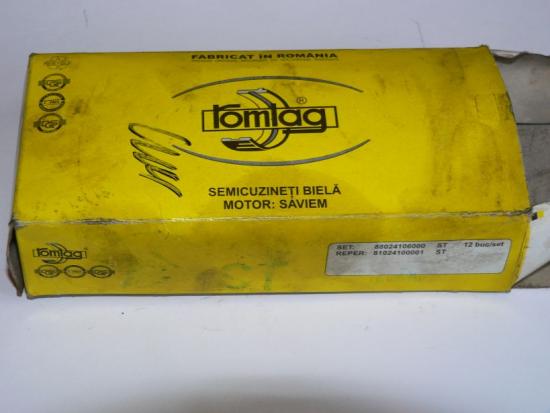
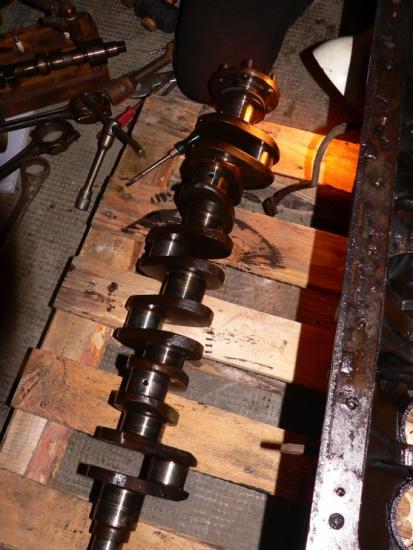
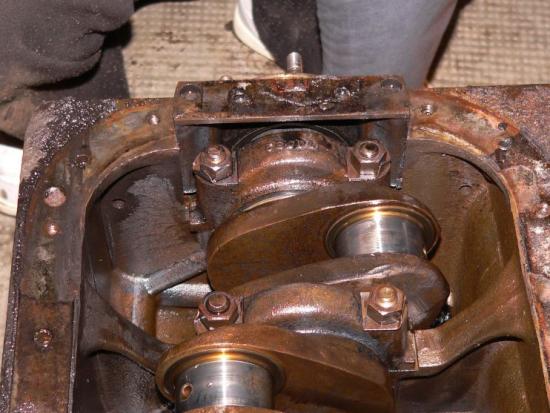
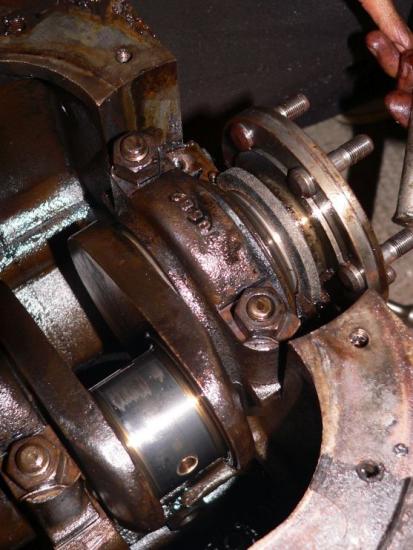
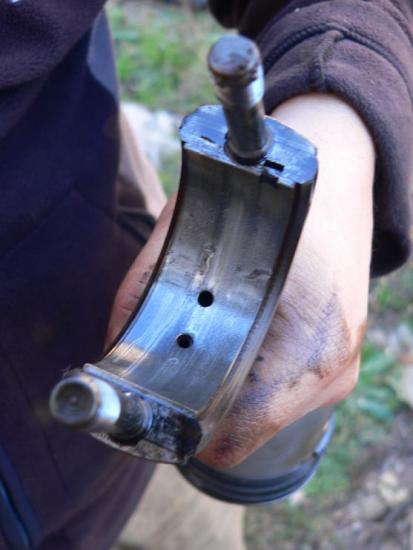
ENGINE Engine rod bearings. This is how we ended up solving the unobtainable engine rod bearings. Remaking them. From new, larger diameter and thicker ones - from a Saviem truck. A aluminum cylinder had to be machined of the size of what the cranckshaft will be. Bearings were forced to fit in each half of the rod, then cut the excess length. Finally they were mounted inside the rod with the cylinder and bended again by tightening the two half sides of the rod. Cranckshaft had to be machined to exactly the same dimension for tight fit. Although I was skeptical about the result, the mechanic told me this was usual once in the days. It seams to be working. The old school mechanic is priceless !!!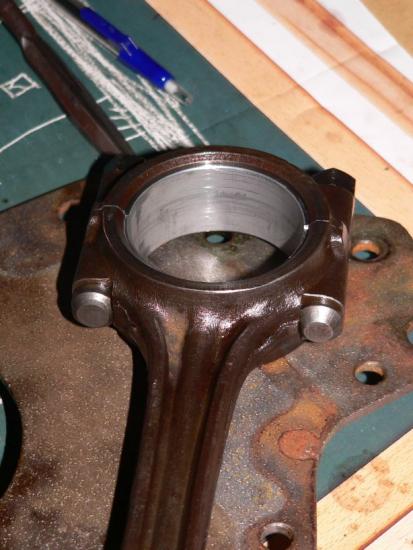
- 118 svar
-
- 2
-
-
Sugga #443
ämne svarade på Costin Mogas Costin Moga i Volvo Sugga/TP21/RAPTG 915/Volvo 912 och TL-varianterna
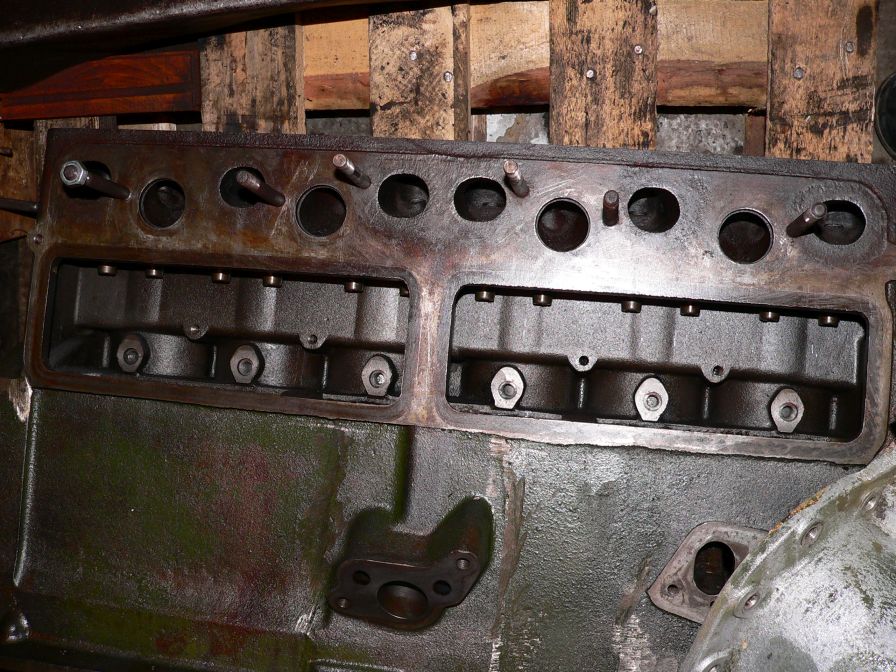
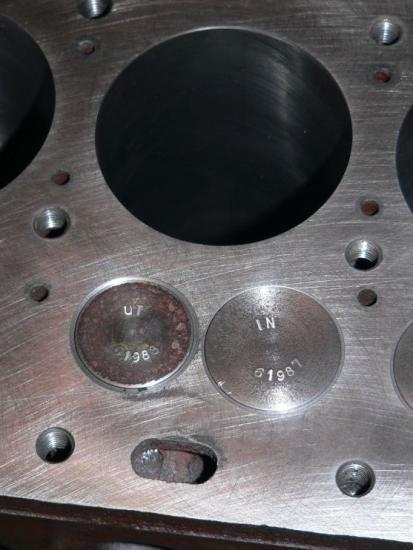
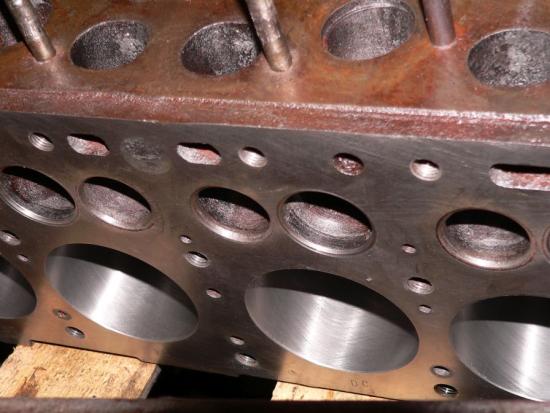
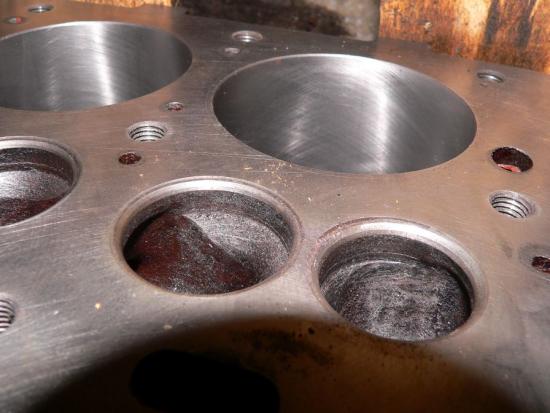
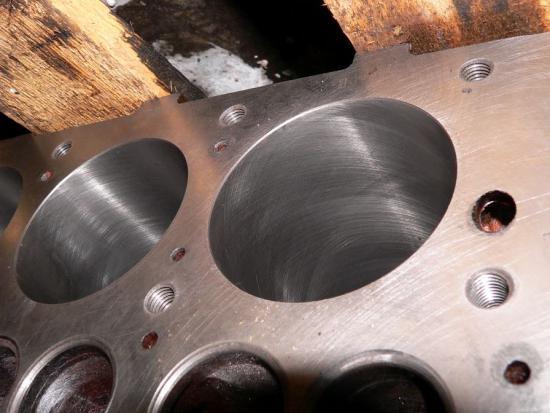
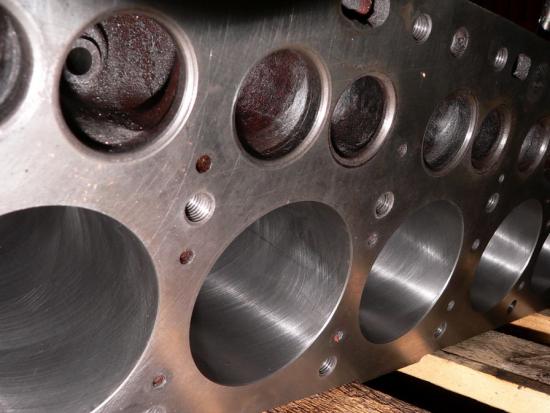
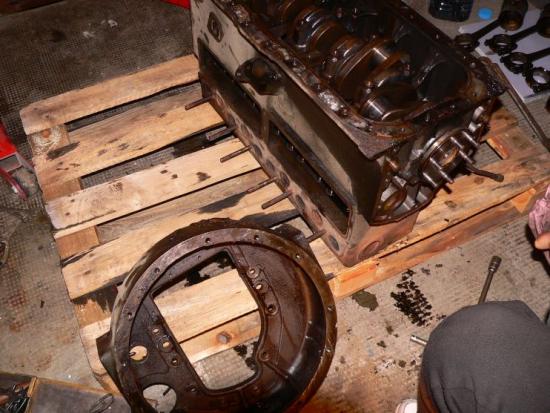
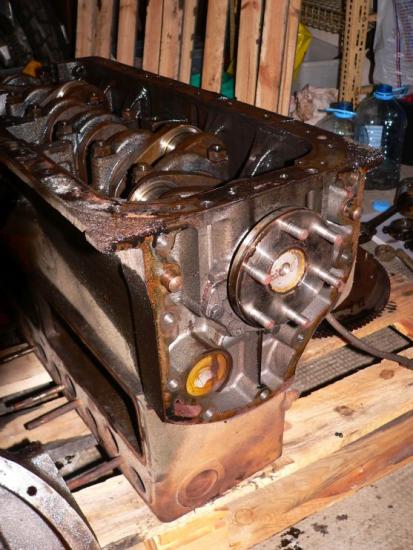
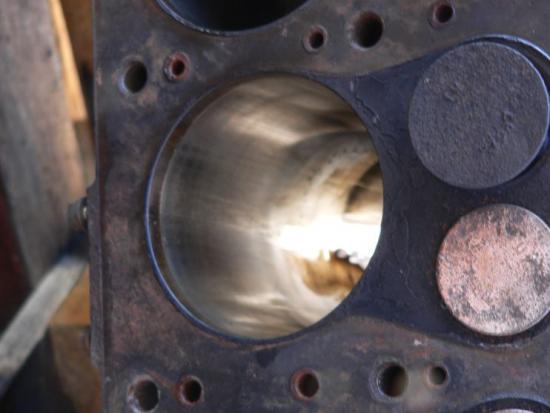
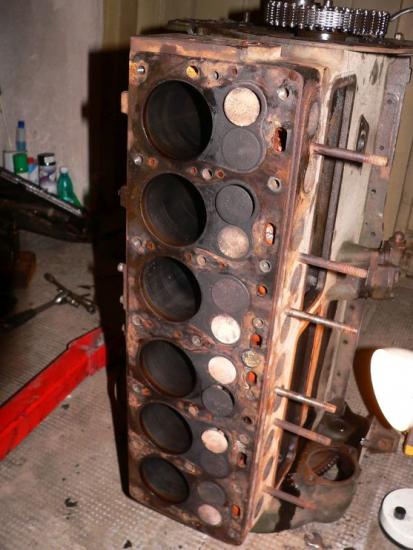
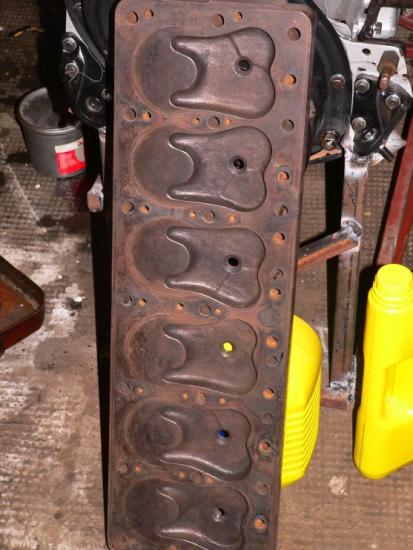
ENGINE SLEEVING Decision was swift: engine wear was significant, larger pistons (repair #1) were unavailable, therefore sleeving was needed in order to reuse original pistons. Something had to be done with the engine rod bearings and cranckshaft too. Until then - sleeving: Pistons were maked before taking them out and engine carried to the turner. He honed the engine block, inserted the cylnder sleeves, measured each piston, and acording to their size added 0.5mm to cylinder diameter. Better than new... Note the last image showing the side of the engine - you can see the cylinders which had a hole on one side. Now it's blocked by the cylinder sleeve. Our guess it is a technological hole, it had no use, beeing below bottom piston travel. Let me know if you have a different opinion.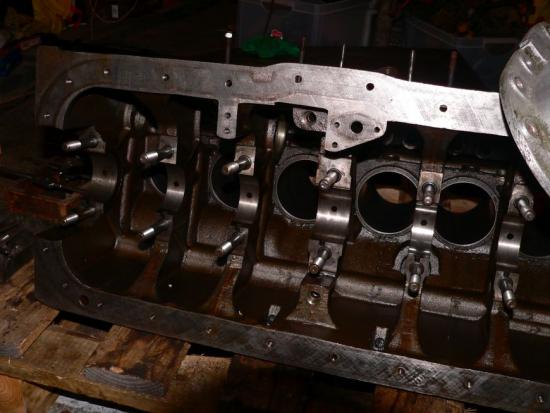

- 118 svar
-
- 4
-
-
Sugga #443
ämne svarade på Costin Mogas Costin Moga i Volvo Sugga/TP21/RAPTG 915/Volvo 912 och TL-varianterna
ENGINE Stripping & Cleaning Not much to comment on this operation. Stripping bit by bit, lots of photos. Cleaning with diesel and splash with water. And very fast sweep and dry as cast iron starts rusting in less than 30 min.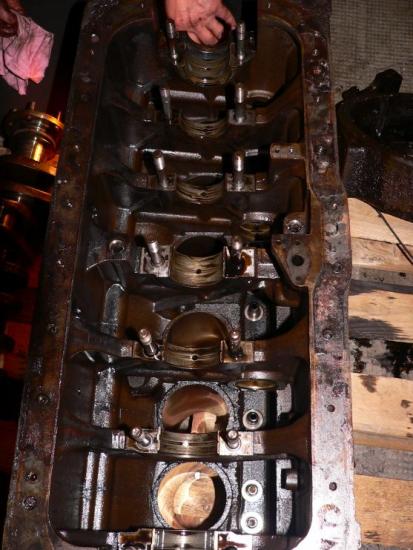

- 118 svar
-
- 4
-
-
Sugga #443
ämne svarade på Costin Mogas Costin Moga i Volvo Sugga/TP21/RAPTG 915/Volvo 912 och TL-varianterna
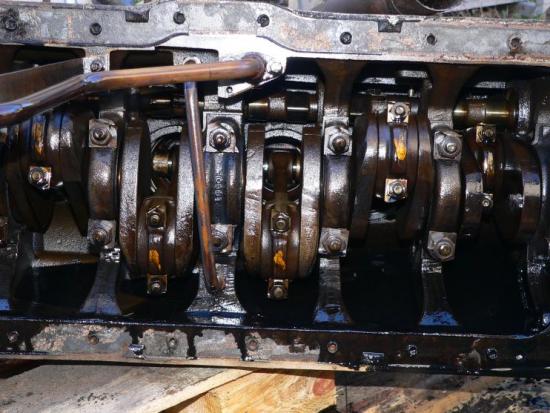
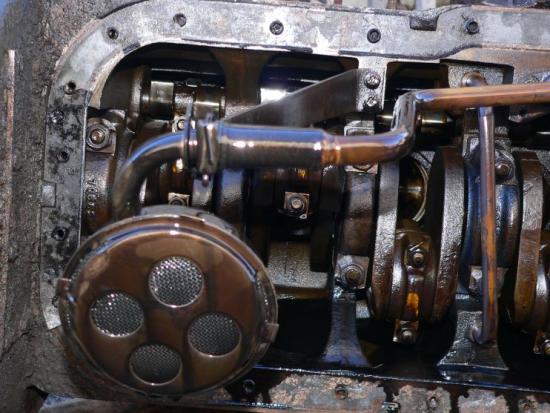
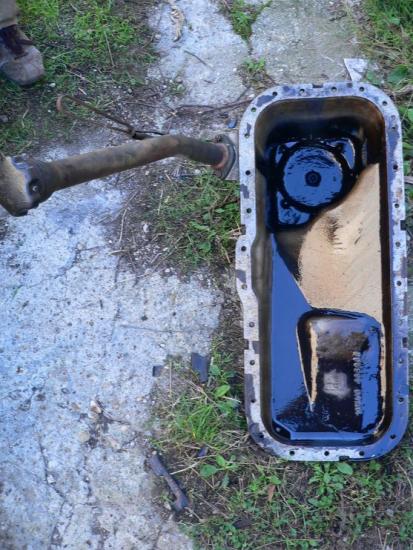
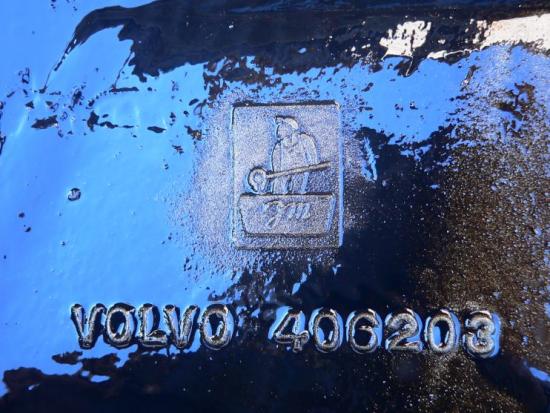
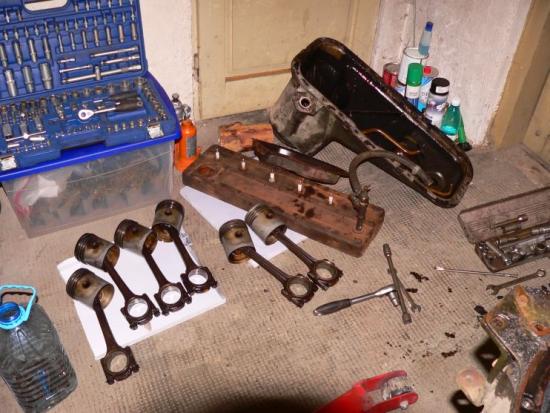
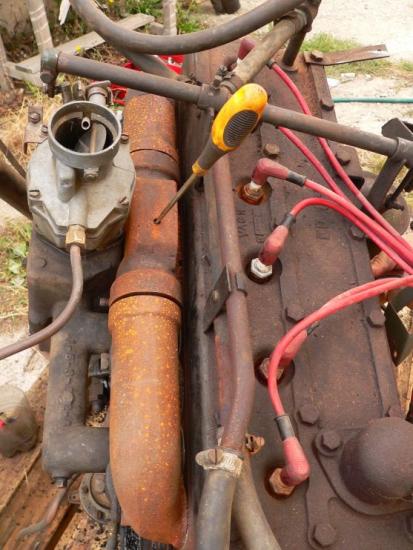
ENGINE So, where to start to ? Obviously, brake apart, make a list of parts, logistics, repair, rebuild. It did not look very shiny at this point, though... Manifold. Solved. Broken engine rods roller bearing. made of unobtainble. Problem. Engine wear. To be honed and sleeved. Not in stainless, no... Piston rings - worn out. Not to be found. Dynamo. Missing. Was replaced by previous owner by an alternator. Water pump. Repaired at one time. Not with original parts, poor quality. To be overhauled. Conclusions - let's stay optimistic. We can do this ! Looks like the little man on the bottom of the oil bath is saluting us ! Have you noticed it ?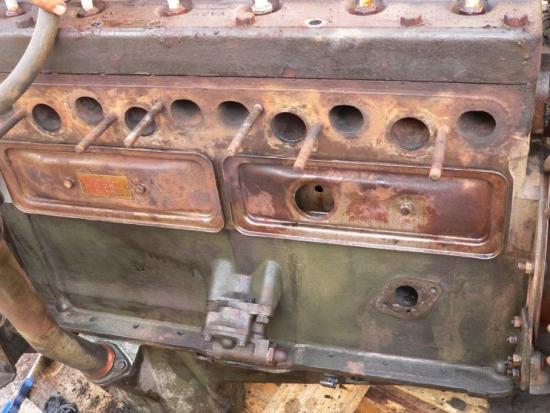
- 118 svar
-
- 2
-
-
Sugga #443
ämne svarade på Costin Mogas Costin Moga i Volvo Sugga/TP21/RAPTG 915/Volvo 912 och TL-varianterna
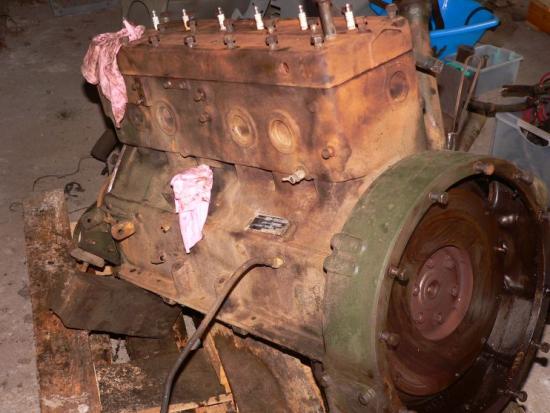
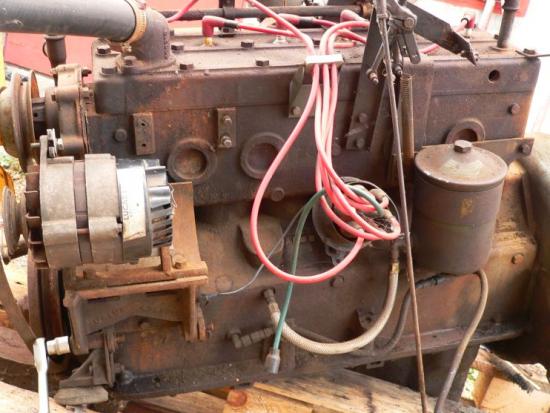
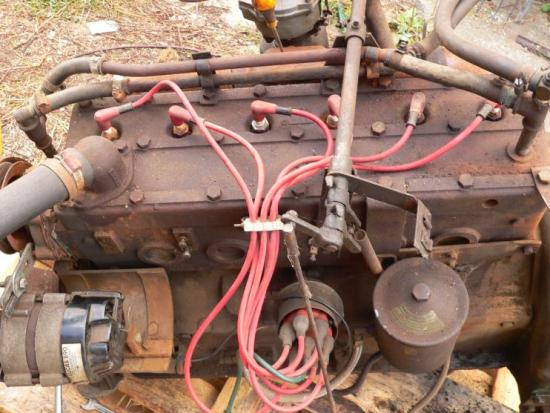
ENGINE First glimpse. Engine was a non-runner. Previous owner had a problem with a broken manifold. We all know this part is made of a very poor cast iron and is subject to rust. But it was turning and had oil in it. Through ALTYCO I managed to purchase a 'used but good' manifold, and, following a fast replacement, we fired up the engine !!! This is how it looked like when taken off the car.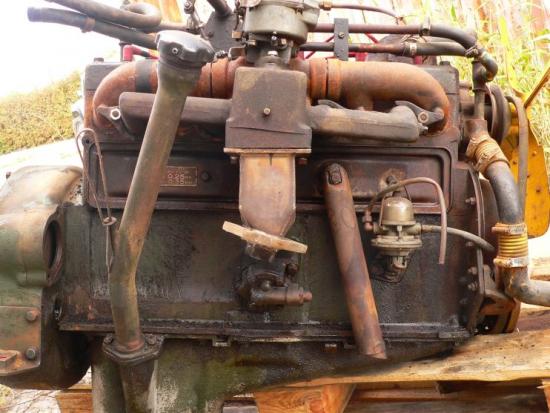
- 118 svar
-
- 1
-
-
Sugga #443
ämne svarade på Costin Mogas Costin Moga i Volvo Sugga/TP21/RAPTG 915/Volvo 912 och TL-varianterna
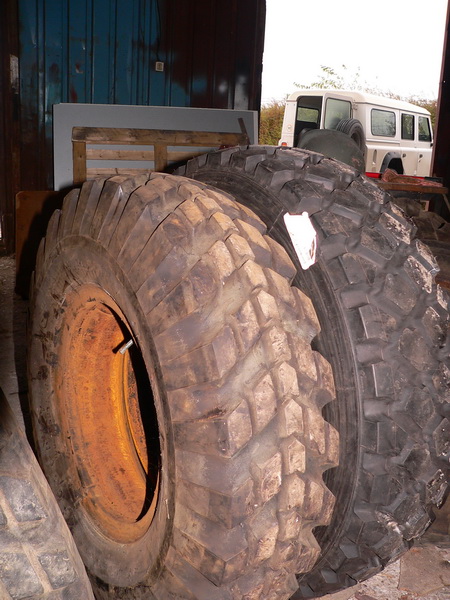
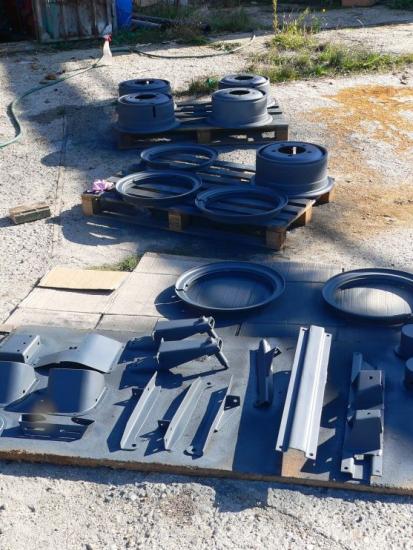
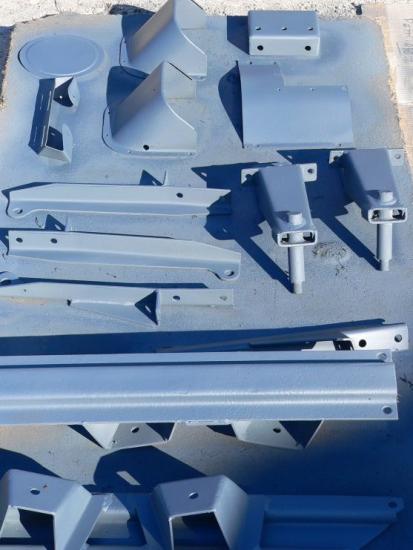
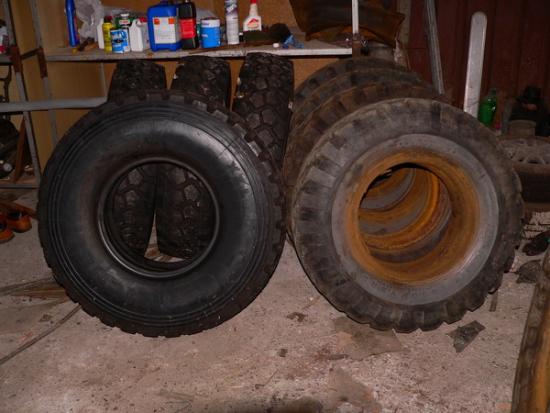
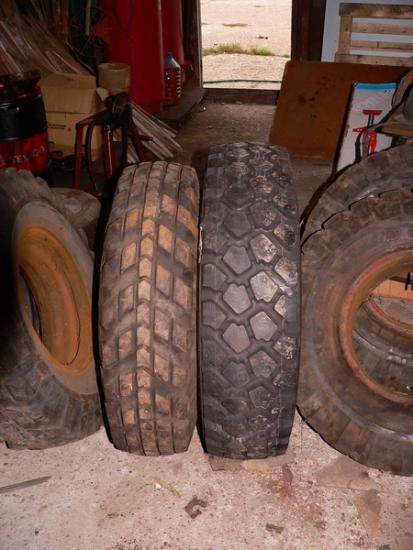
RIMS / TYRES / CHASSIS PARTS Rims and all chassis parts, bits and pieces - all got sandblasted and painted. Tyres were rock hard and need replacement. My choice went to Michelin XZL 9.00 R16 which is a sort of equivalent to 9.00 16 (but not quite). These are actually 255 100 R16 meaning exactly 10.00 R16, thus an inch larger in width and 2 inches in diameter. These look fantastic on the vehicle ! And perform well too ! Especially in mud. Snow is ok, but I've seen better. Interesting feature is they weight 40 kg/pcs !!! Tubes are 2 kg/pcs ! I bought 4 pcs new from an ex-mod parts seller in UK (MOD=ministery of defence) but can't remember contact/link. If remember well cost was 130 euro/pcs + shipping. A bargain, one could say - remember to haggle when you buy from UK, especially when paying cash without receipt. It works. Unfortunatelly, these tyres do not have the Swedish Army 3 crowns labell .

- 118 svar
-
- 3
-
-
Sugga #443
ämne svarade på Costin Mogas Costin Moga i Volvo Sugga/TP21/RAPTG 915/Volvo 912 och TL-varianterna
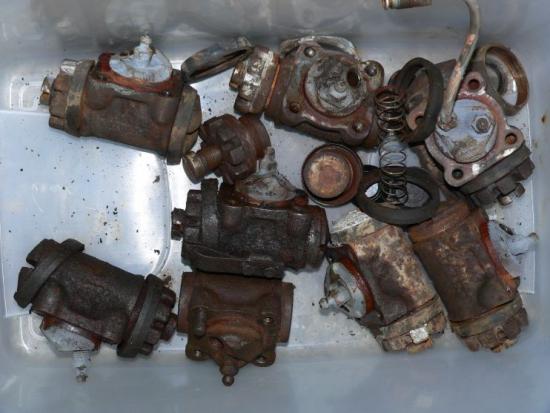
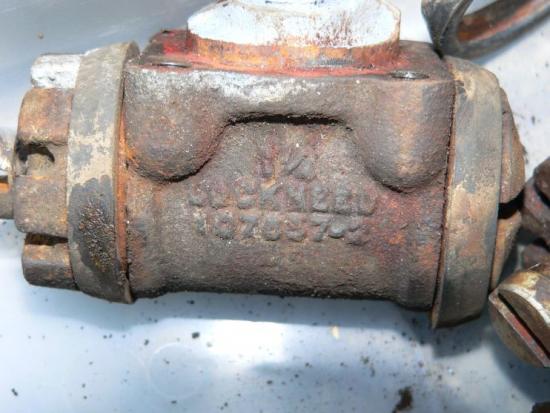
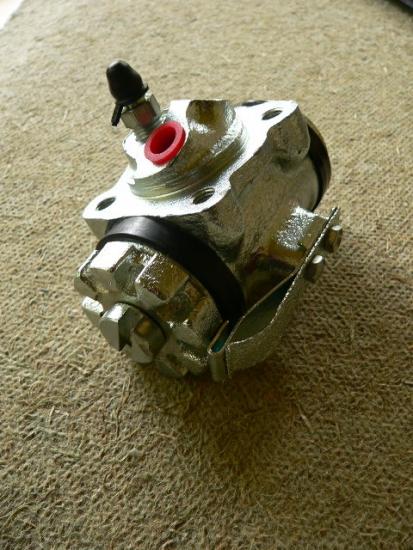
I did them locally, but they leaked. Sleeve has to be 'glued' otherwise it will leak between the sleeve and the cylinder wall. There is a special machine to hone small diameters like wheel cylinders which I couldn't find locally. I marked: 'do not try this at home !'- 118 svar
-
- 1
-
-
Sugga #443
ämne svarade på Costin Mogas Costin Moga i Volvo Sugga/TP21/RAPTG 915/Volvo 912 och TL-varianterna
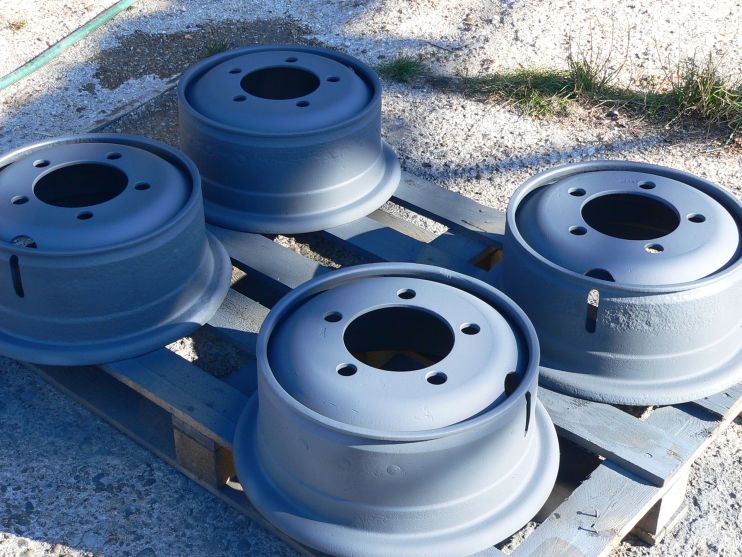
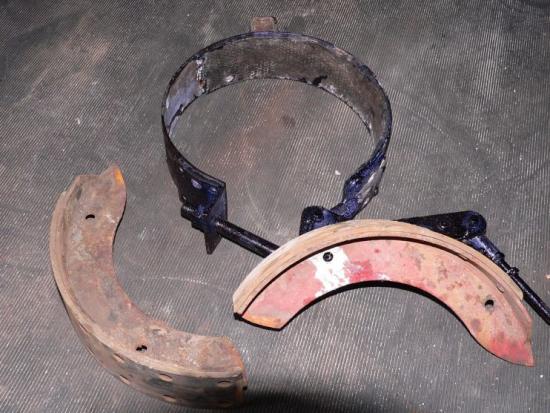
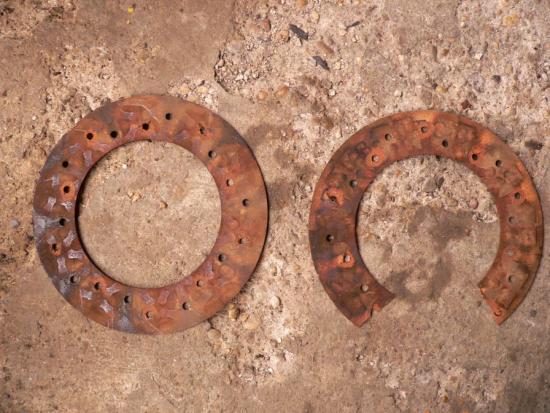
BRAKES Now this is important ! Get it right and it will be bulletproof. BRAKE DRUMS I had mines machined / rectified. On the other hand, ALTYCO stockes about 100 NOS pcs (!) - it might be better to purchase new if shipping costs are afordable.... BRAKE SHOES I had them cleaned and relined with new (modern) friction material. Bonded (glued) not riveted. HAND BRAKE Again, cleaned, relined. Riveted in this case. MASTER CYLINDER Rebuild, sleeved in stainless, new seals including dust seals, by PastParts UK (http://www.pastparts.co.uk/) Do not try this at home !!! Just send them the part as is, and be amazed what you'll get back ! WHEEL CYLINDERS Same by Pastparts UK My opinion is, although a costly operation, it is worth sleeving in stainless. This will give you sort of lifetime guarantee of the part, plus a trustworthy brake sistem. Other option is regular servicing. Not my cup of tea. I prefer do and forget. BRAKE HOSES New from ALTYCO. BRAKE LINES I used cunifer pipe (not copper) and homemade them all. New nipples (ebay). Flare tool (ebay). BRAKE FLUID DOT 5.1 - because it is hydrophobic. One think I thought of is mounting a remote servo. It seams easy to fit but I've no ideea of how much vacuum is needed and if engine provides enough. My guess it does.
- 118 svar
-
- 1
-
-
Sugga #443
ämne svarade på Costin Mogas Costin Moga i Volvo Sugga/TP21/RAPTG 915/Volvo 912 och TL-varianterna
Altyco nolonger has all leaf springs on stock. I would have done exactly the same, but had to deal with only main ones (first and seccond). It is tricky operation, yes.- 118 svar
-
- 1
-
-
Sugga #443
ämne svarade på Costin Mogas Costin Moga i Volvo Sugga/TP21/RAPTG 915/Volvo 912 och TL-varianterna
LEAF SPRINGS Leaf springs were disasambled, cleaned and painted. First two blades were replaced (ALTYCO). These came complete with bronze bushes. I still regret not to have them sandblasted and powder coated.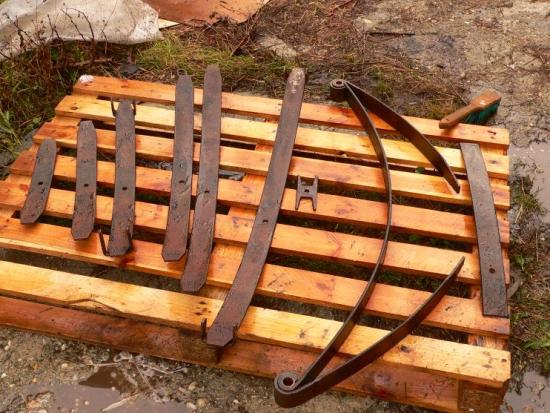

- 118 svar
-
- 1
-
-
Sugga #443
ämne svarade på Costin Mogas Costin Moga i Volvo Sugga/TP21/RAPTG 915/Volvo 912 och TL-varianterna
Here you have a technical drawing of the seal mounting tool. scula simering Volvo 3D.pdf scula simering Volvo.pdf- 118 svar
-
- 2
-
-
Sugga #443
ämne svarade på Costin Mogas Costin Moga i Volvo Sugga/TP21/RAPTG 915/Volvo 912 och TL-varianterna
This is not relevant, more important is how long would have taken the restoration, should I had been working continously. My guess is 3 month. Full time job. Time gets easily expanded by waiting for shipped parts to arrive, for spare time, for a sunny day, and so on. Told you - logistics !- 118 svar
-
- 1
-
-
Sugga #443
ämne svarade på Costin Mogas Costin Moga i Volvo Sugga/TP21/RAPTG 915/Volvo 912 och TL-varianterna
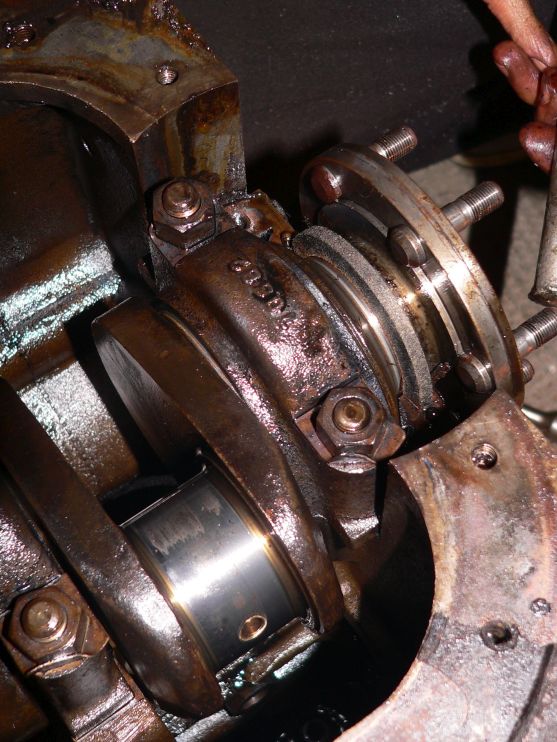
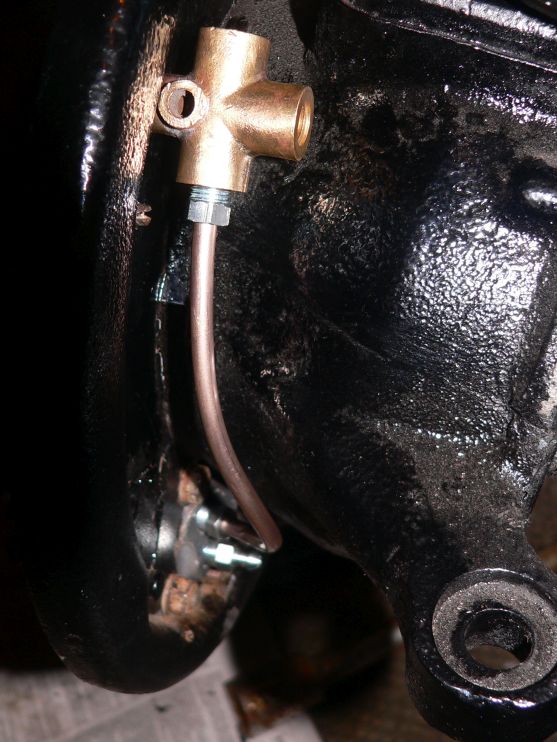
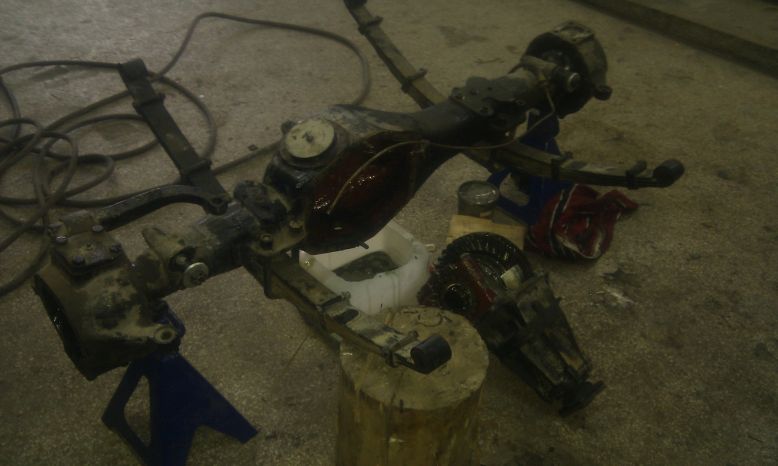
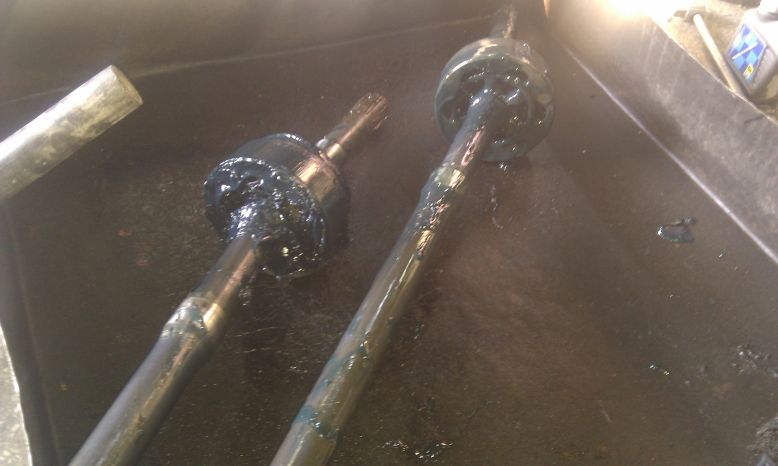
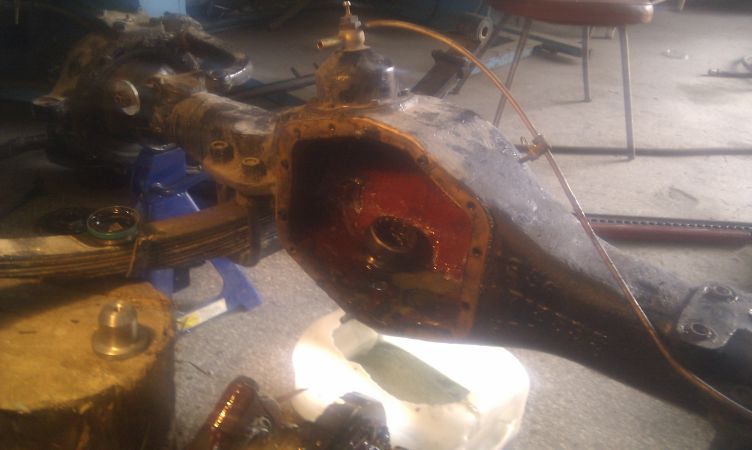
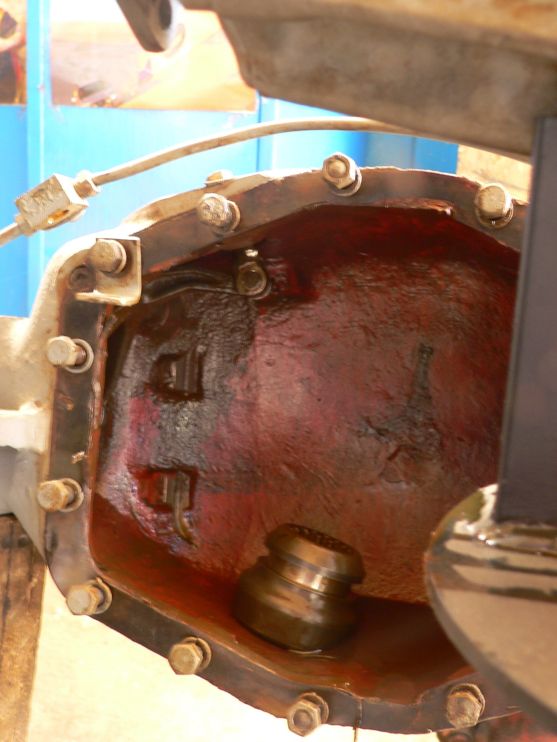
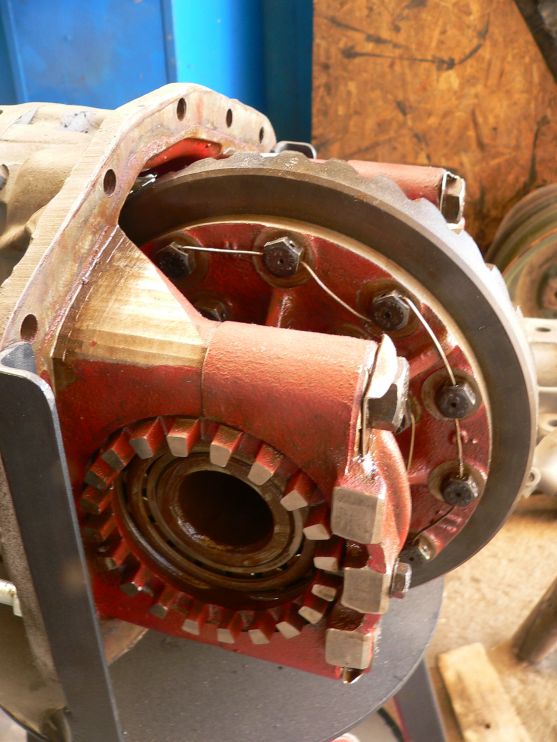
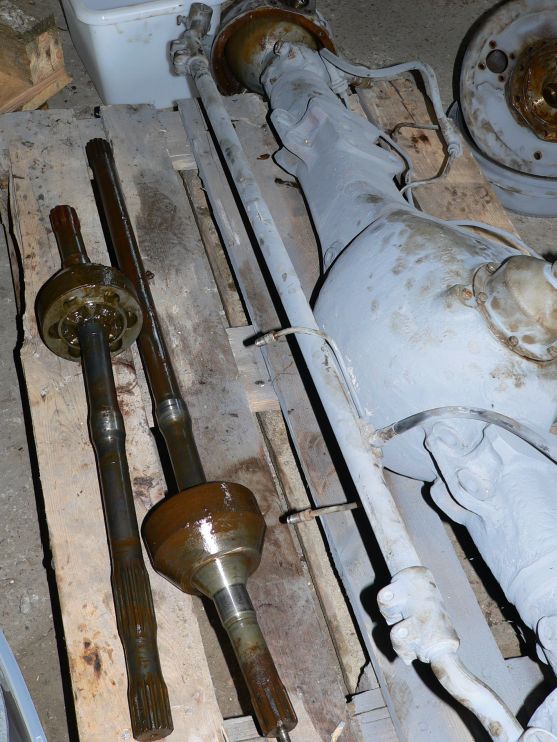
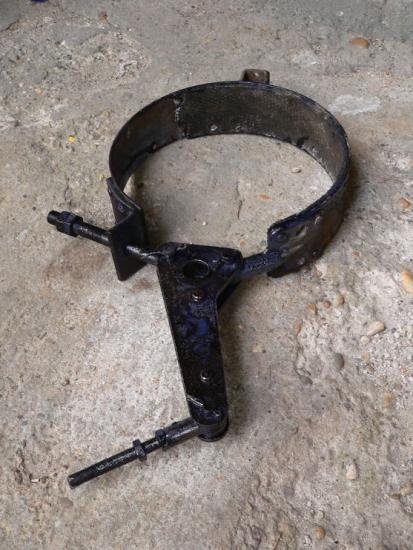
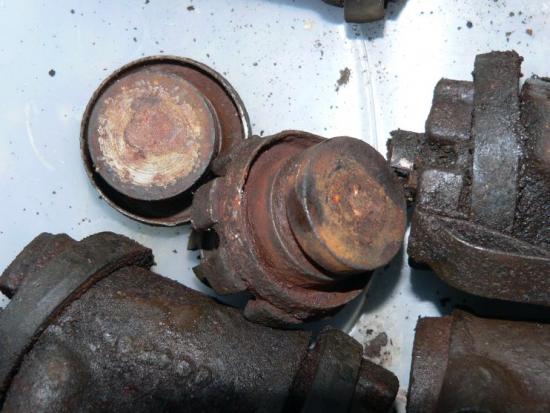
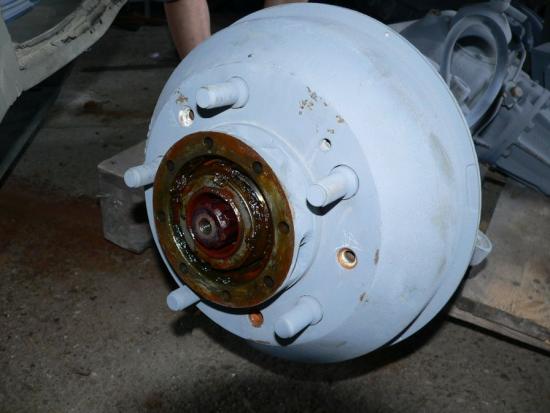
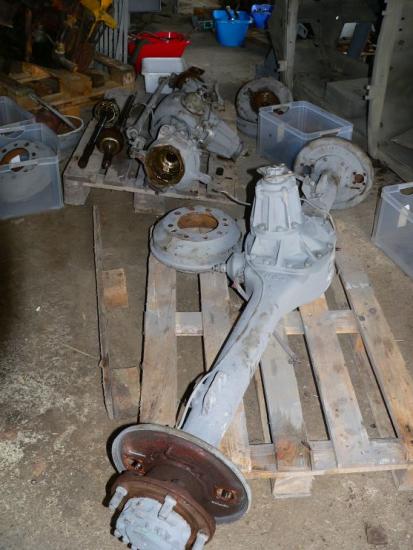
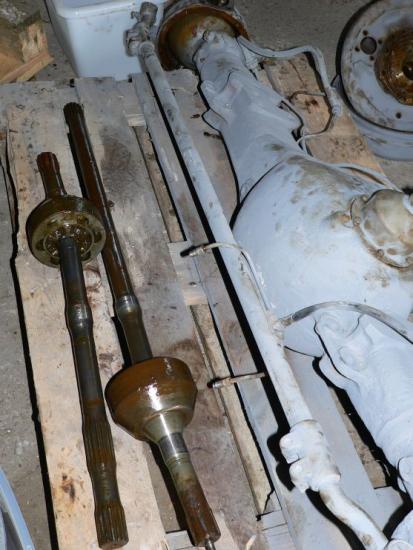
3. SERVICEING AGAIN Well, after using the car for a while (time passed since serviceing and car was completed), front axle started leaking again through the hub. Disaster - this means something wrong with the oil seal !!! Oil seal had to be changed (again) in the front axle. Any ideea what this means ? No ? Well, we thought we can access the differential just by removing the front drive shaft, but, hell no !, there is no room to get the differential out, as it won't clear the oil bath. Axle has to be removed from the vehicle. So: - front drive shaft was removed - brake lines removed and (some) brake fluid lost - vacuum hoses removed - front leaf springs unbolted - car suspended on jacks just after the leaf spring rear mount - axle removed (remember this is heavy !) - wheel removed - brake cylinders removed - all hub assembly removed - differential removed - axle shafts removed - oil seal replaced - reverse all operations + brake fluid topped and brake sistem air cleaned THIS WAS A 2 DAY FULL JOB / 2 MEN !!! all for a stupid wrong mount of the oil seal ! What went wrong / mistakes: 1. Seal was placed wihout using the special tool needed - you can't perform this job properly without it 2. Use of a seal which did inot have a solid metal housing 3. By using the car, seal came off from its place allowing oil to pour along the axle shaft, thinning the grease in the joint and finally leaking through the hub - have a look at the 2 shafts - one with thinned greas, one with normal grease ! What to do: - make yourself a tool - see image 18 (last one) - there is a metal tool looking like a cylinder in the left lower corner - seal has to be put on it (it has same OD outside diameter as the ID inside diameter of the seal) - tool has then to be placed inside the differential housing and bolted on a very long bolt passed through the axle end - pull this long bolt out untill seal reaches its place and press it there (using a nut and spanner) - use a solid metal housing seal to withstand pressure applied when squeezed in its place Please, if you have leaking hubs needing oil seal replacement, do the job yourself to make sure it's correctly done ! Remember the vintage image attached - this is the job they performed.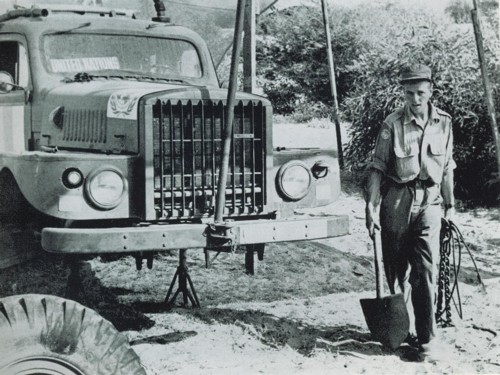


- 118 svar
-
- 5
-
-
Sugga #443
ämne svarade på Costin Mogas Costin Moga i Volvo Sugga/TP21/RAPTG 915/Volvo 912 och TL-varianterna
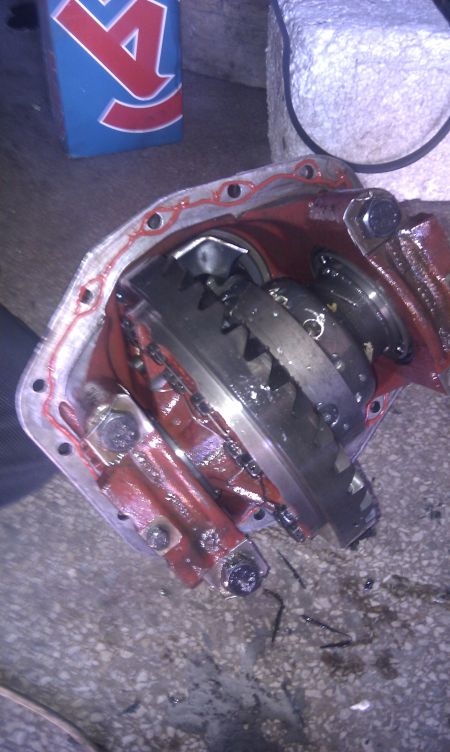
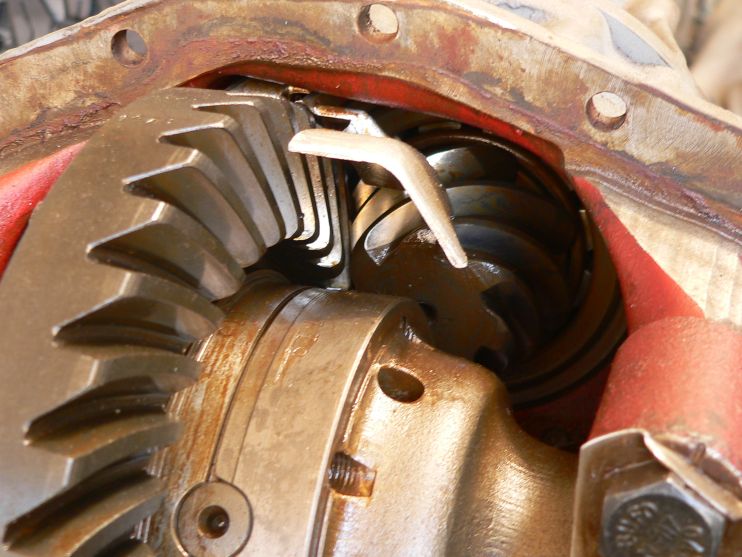
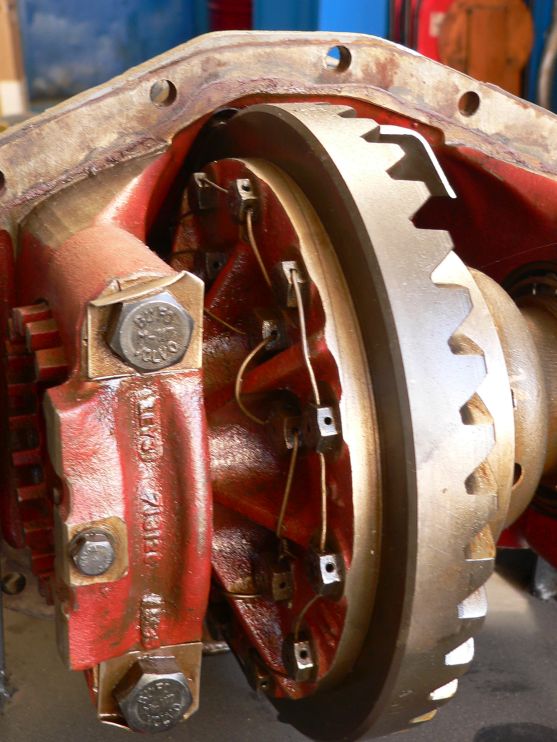
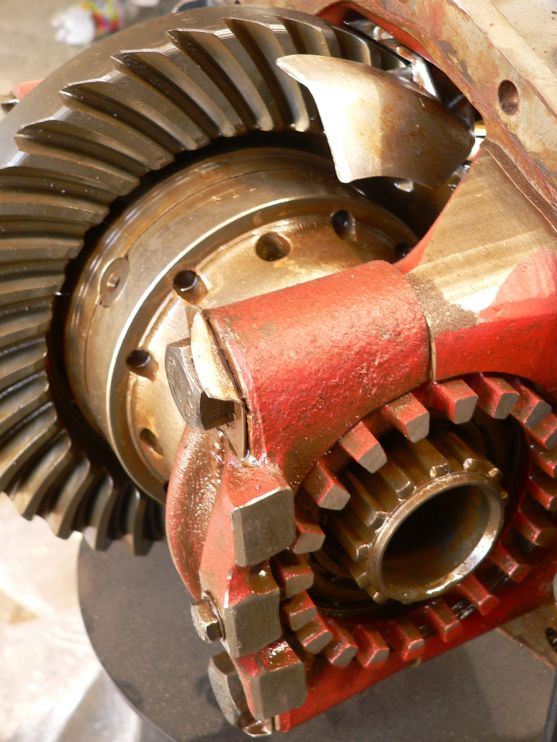
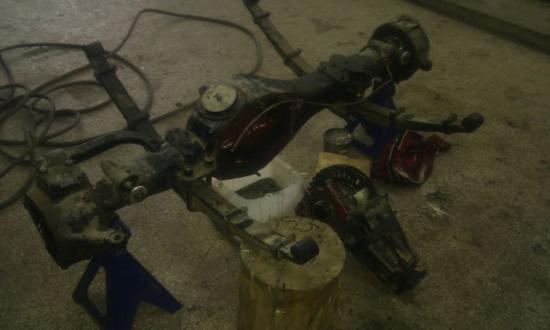
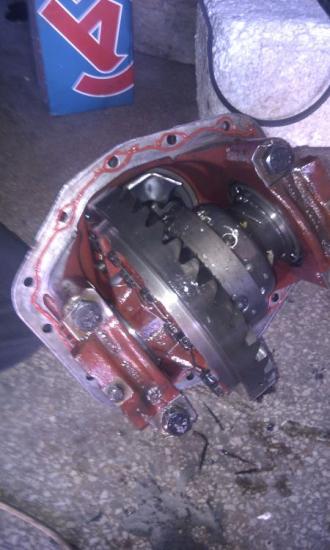
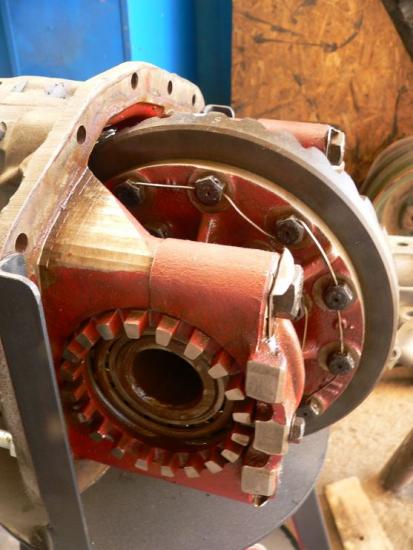
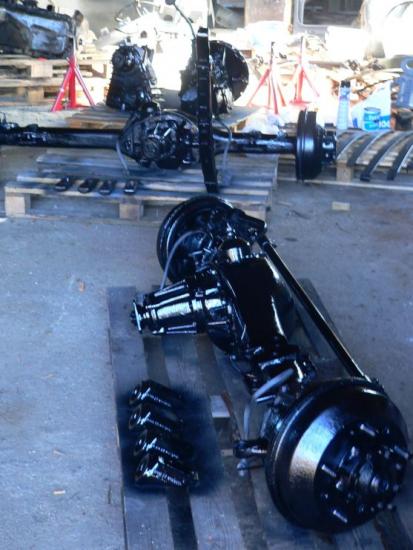
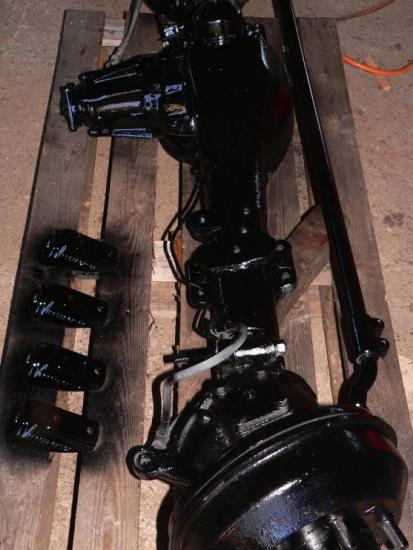
AXLES 2. SERVICEING While the 4x4 'specialists' were working on the axles, I had time to take some pictures of the differentials. These are quality components ! Just have a look at how these are build ! Serviceing included: - front axle: oil seals, bearings - rear axle: oil seals (bearings were in very good shape) Work was performed with axles off the chassis, therefore no brake lines, vacuum...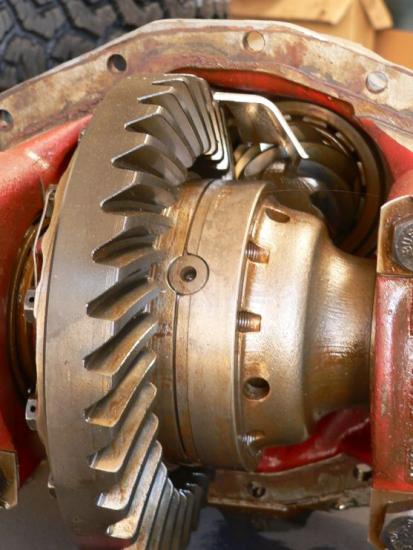


- 118 svar
-
- 5
-
-
Sugga #443
ämne svarade på Costin Mogas Costin Moga i Volvo Sugga/TP21/RAPTG 915/Volvo 912 och TL-varianterna
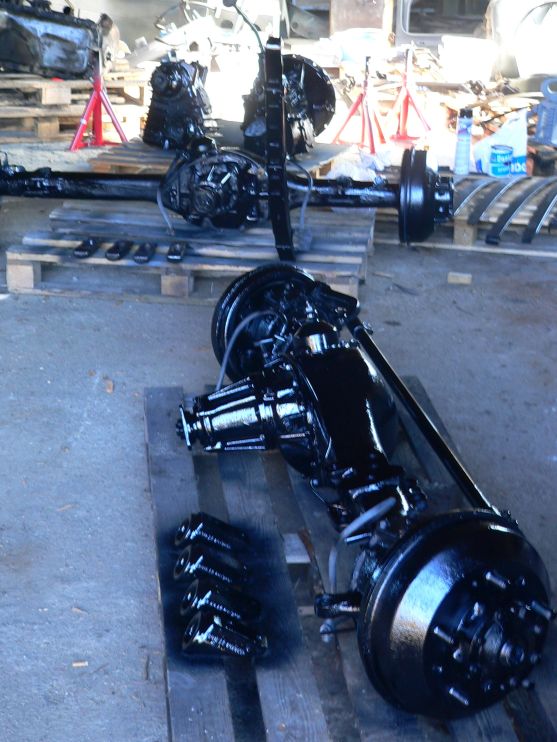
AXLES Well, this one was hard. First of all due to theis shear weight. Until one tries to move an axle, you have no ideea how heavy they are. Especially the front one ! My guess is front axle is the heaviest single component of the vehicle after the engine. Therefore moving them around proved to be a pain in the ***. Seccondly, because the oil seal in front axle is so difficult to mount. Basically all components have to be removed. Seal is to be mounted through the differential using a special tool. It was the one only operation in all mechanical restoration I asked a 'specialised' 4x4 service to perform. And they did it wrong. The story: 1. CLEANING AND PAINTING Axles were removed from the chassis and sandblasted. They shown leaks around differential caps and at the wheel hub (front one). By taking out the shaft one can notice the oil seal (front axle) is sitting on a larger section (see picts) inside the axle and can be remove only through the differential. Ok, I said - I'll sandblast them, paint them, take them to a service garage where they will replace the oil seal before mounting the axles on the chassis.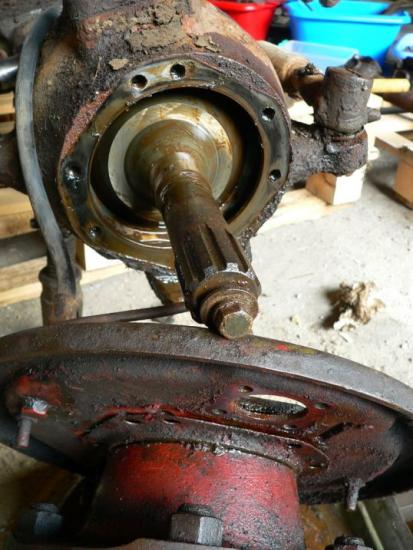

- 118 svar
-
- 2
-
-
Sugga #443
ämne svarade på Costin Mogas Costin Moga i Volvo Sugga/TP21/RAPTG 915/Volvo 912 och TL-varianterna
DRIVE SHAFT Drive shafts were in good condition too. Universal joints showed no sign of wear, same with the slide body. Cleaning, degreasing, paint job, greasing. Done.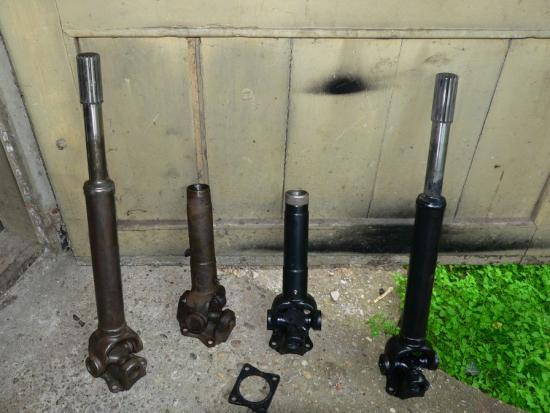
- 118 svar
-
- 3
-
-
Sugga #443
ämne svarade på Costin Mogas Costin Moga i Volvo Sugga/TP21/RAPTG 915/Volvo 912 och TL-varianterna
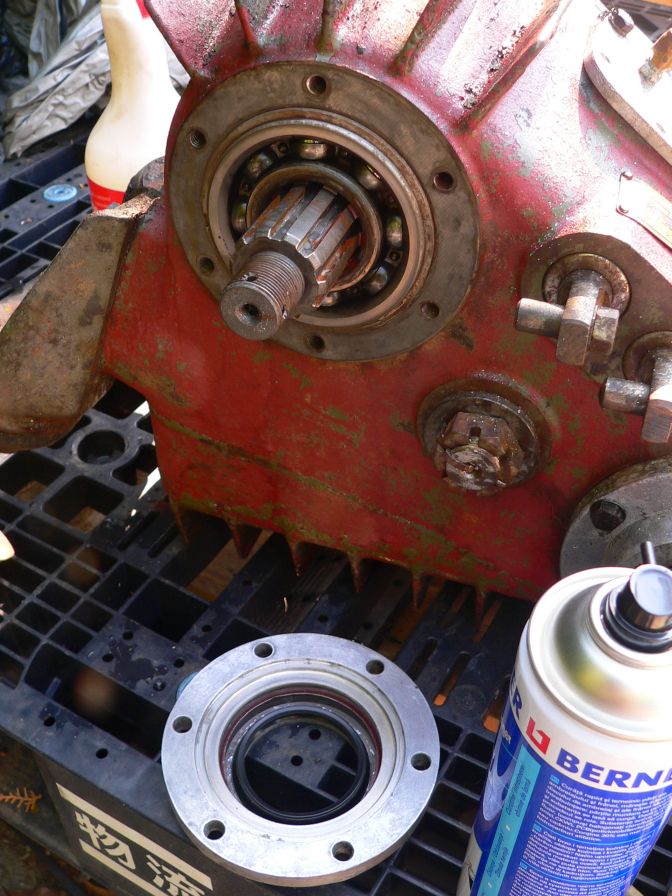
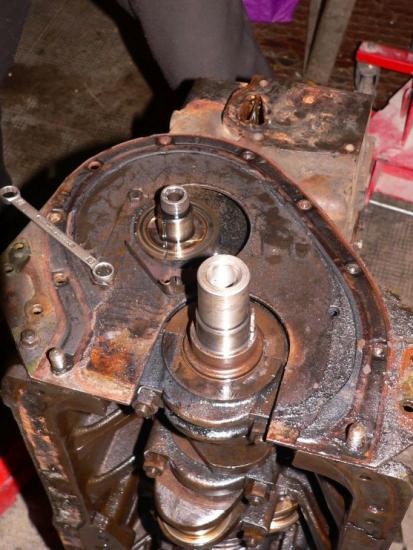
TRANSFER CASE Here we did (almost) nothing. Bearings seamed in good shape - no noise, smooth turning, still tight. Checked the oil and there were no metal scrapings, and, as much as we could see, gears were ok. Very little oil leak. Therefore all we did was to replace the oil seals (local store) and buy new rubber mounting bushes (ALTYCO). Fill up with oil and to storage it went... You can see how easy is to change the oil seals - these are just under the caps. Unscrew, change, screw back.
- 118 svar
-
- 2
-
-
Sugga #443
ämne svarade på Costin Mogas Costin Moga i Volvo Sugga/TP21/RAPTG 915/Volvo 912 och TL-varianterna
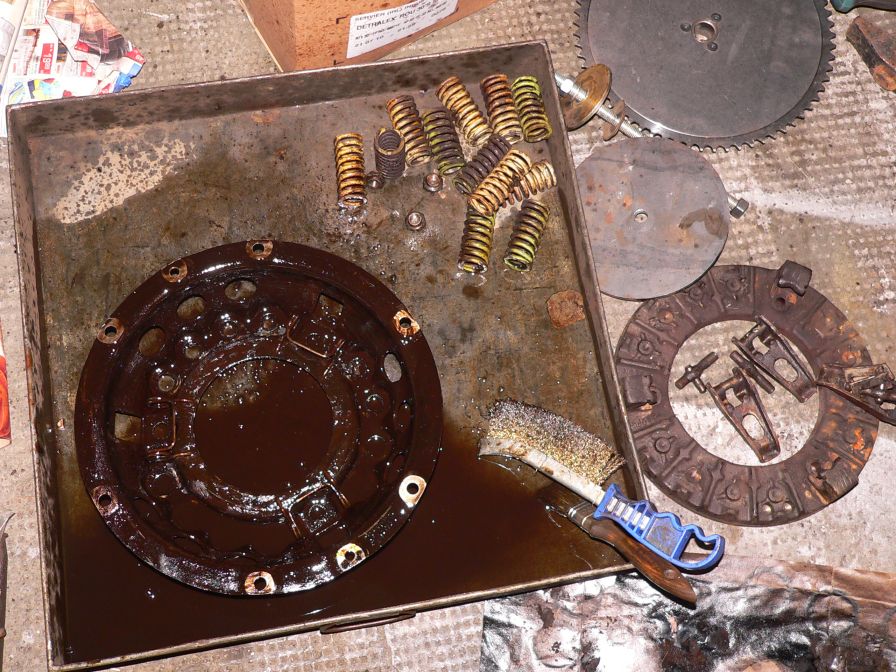
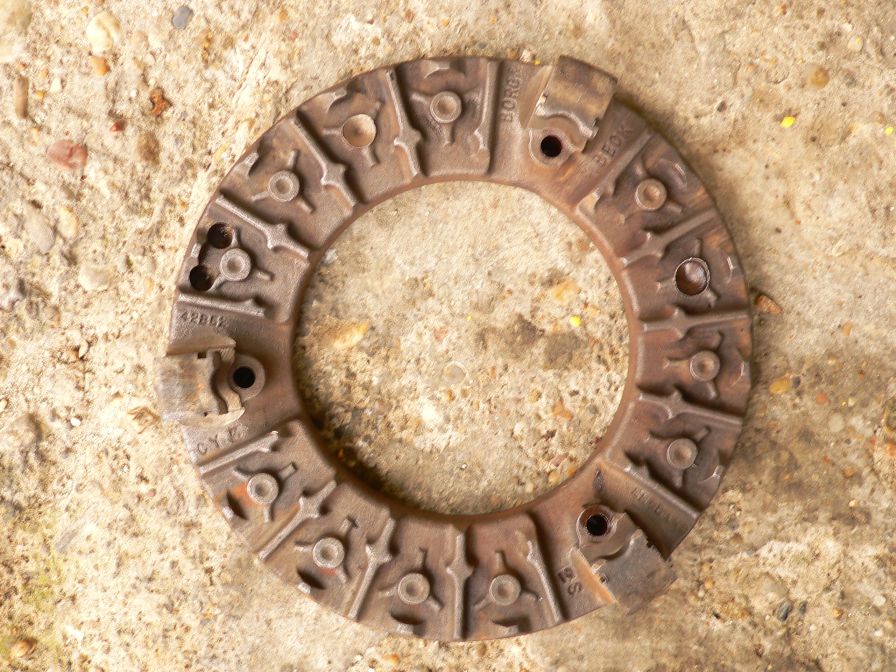
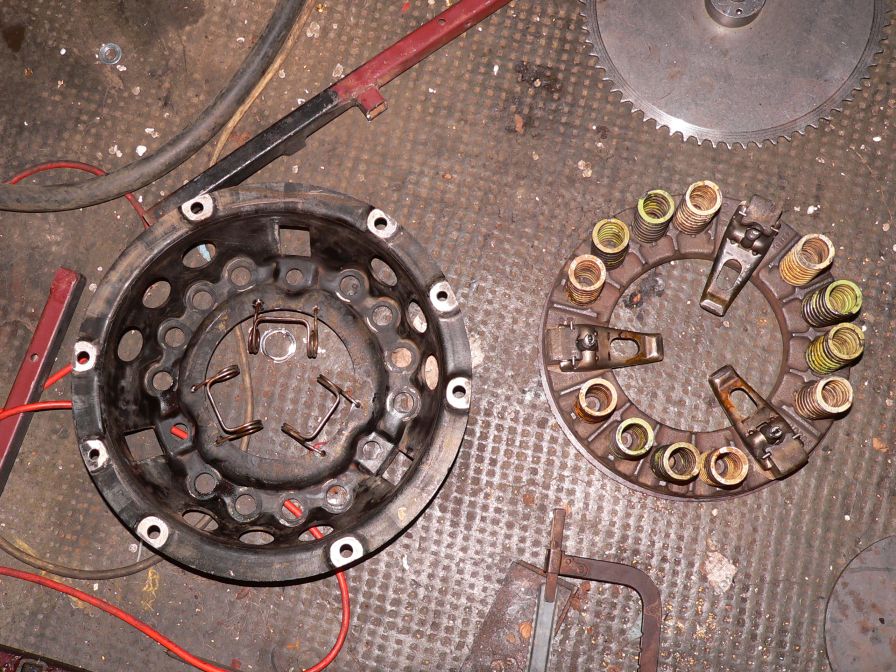
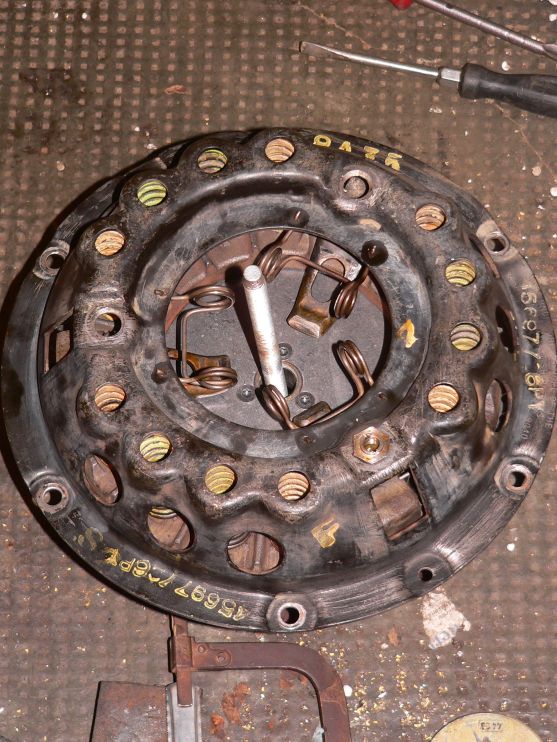
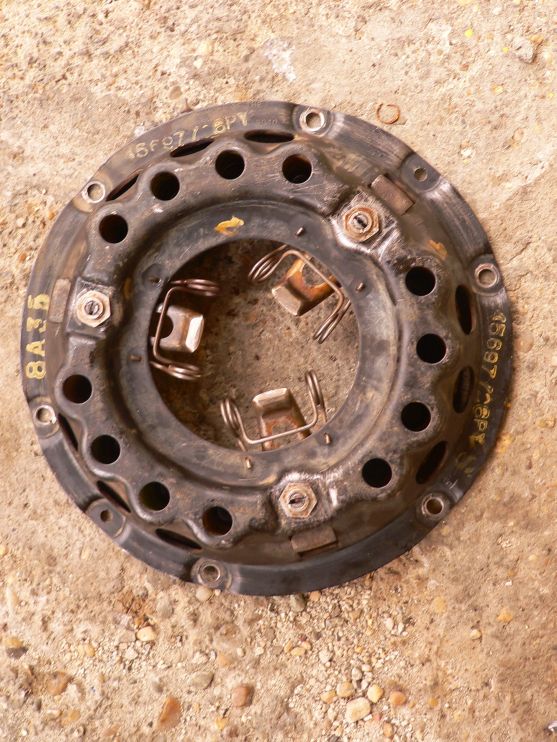
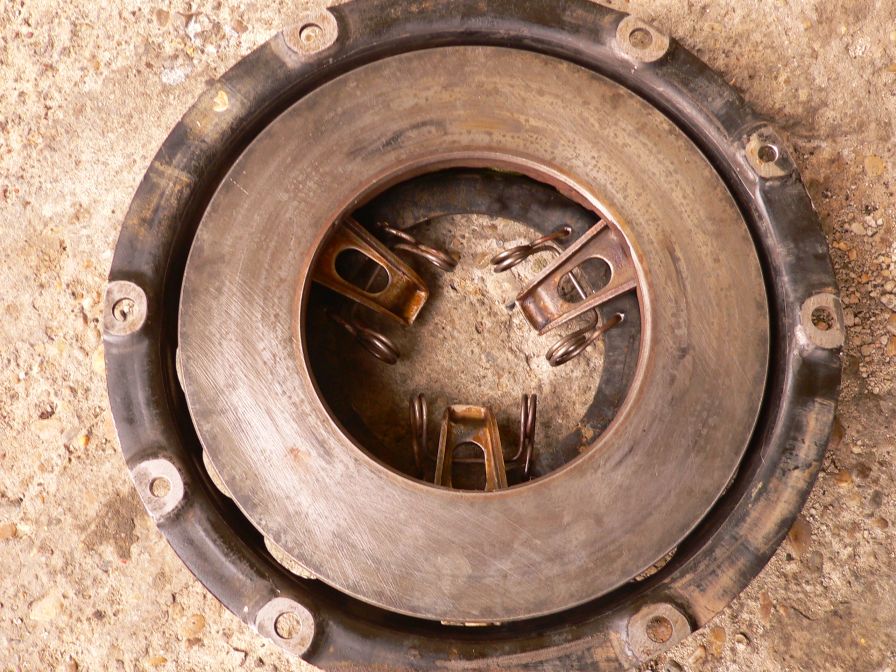
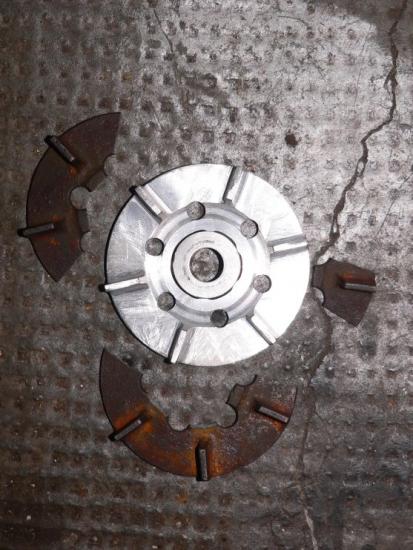
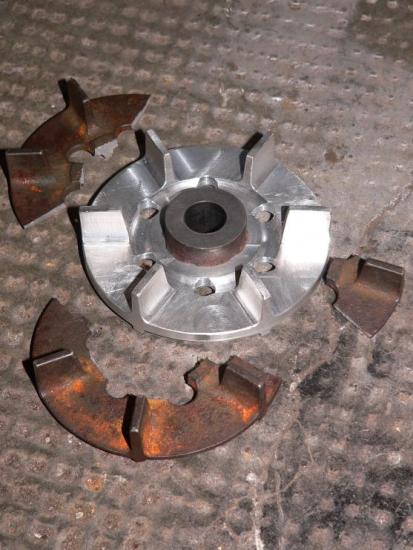
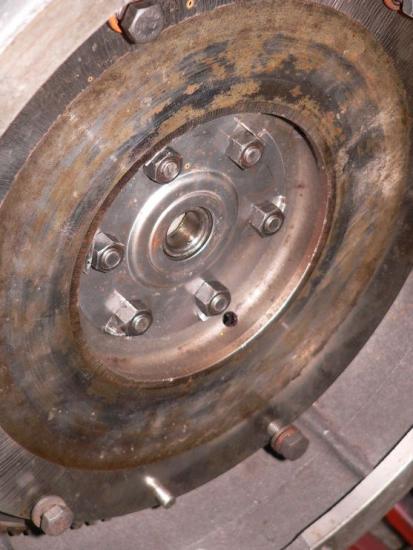
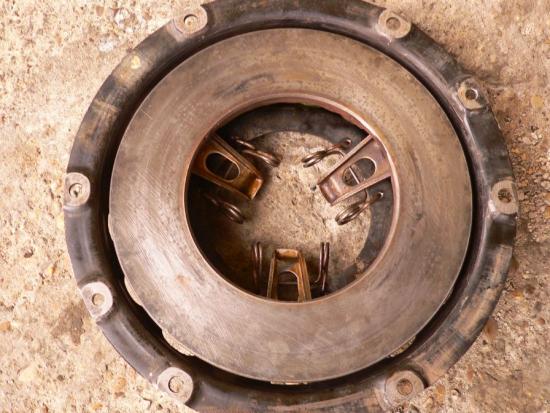
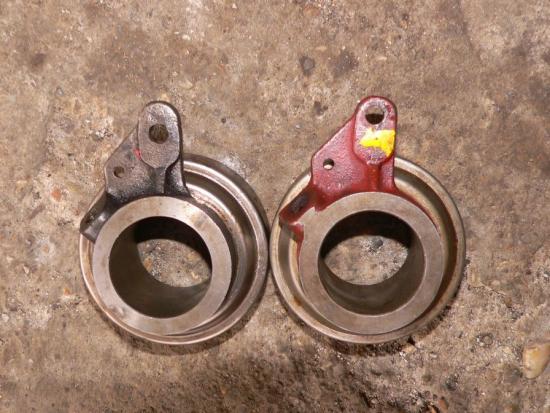
CLUTCH This involved lots of cleaning (with diesel) and degreasing. Once this is done parts can be put back together. Friction plate and pressure bearing were purchased from ALTYCO. Same for the plate rivets. Friction plate received was superior in quality than original (probably not a NOS - new old spare, but build from more modern materials). Rivets seamed to be a problem as are made of a yellowish (brass ?) alloy. We made a tool for punching (did I mention for a restoration like this you'll need help from a lathe operator ?), and start mounting the plate. Ended up braking few rivets. These are brackable and need to be softened before punched. We knew copper is easy to soften by heating until it turns white and then fast submerge in cold water (and I suggest always do so before replacing a copper washer on the car), but brass ? It turned out it has to be heated and left for cooling at room temperature. After we did this, clutch plate was a joke to mount. Interesting is that replacement pressure bearing we got from ALTYCO had a different position of one mounting hole (see pictures). If remember well we replaced the bearing in the original mounting plate.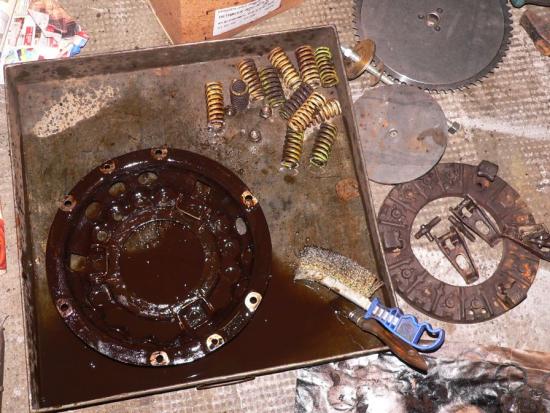


- 118 svar
-
- 1
-
-
Sugga #443
ämne svarade på Costin Mogas Costin Moga i Volvo Sugga/TP21/RAPTG 915/Volvo 912 och TL-varianterna
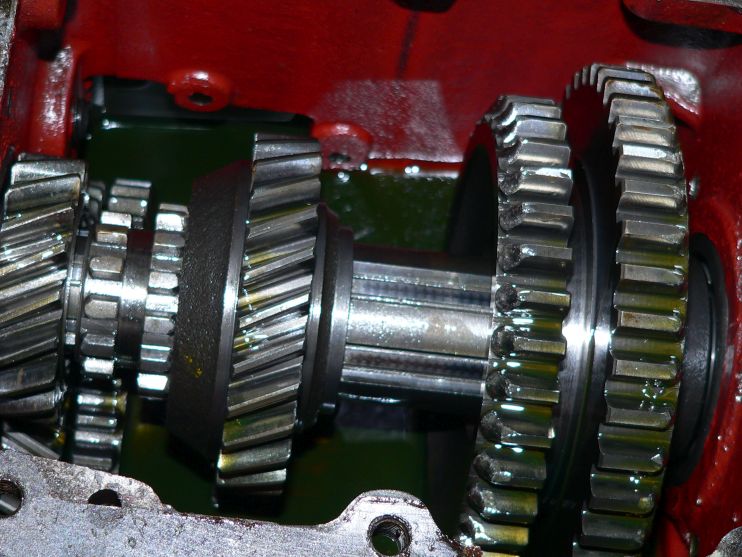
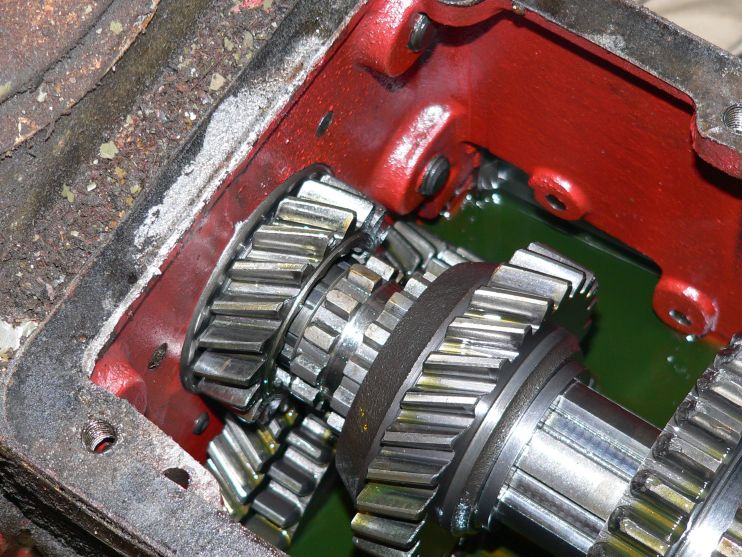
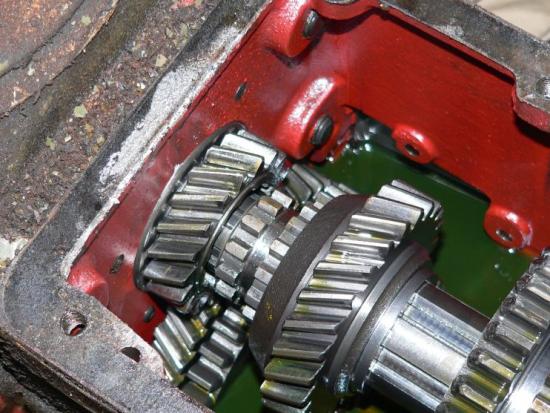
Thanks for the good words guys ! So, next: GEARBOX First thing opened of the whole Sugga was the gearbox. It's within reach, and it opens just by unscrewing the bolts on top. Curiosity won the game, and there we found ourselves looking inside - it's red !!!! Finally something not green ! But gears had seen better days. I guess due to the large bunch of recruits learning how to double clutch over the years. Decision was to replace worn gears. Gears and gaskets were purchased from ALTYCO PARTS AB, bearings and oil seals from a local supplier by comparing dimensions and codes. This is a straight forward job. It's easy and you do not have to be a skilfull mechanic to do it. It is also described in DEL2, page 56 (unfortunatelly for us, in swedish...). It takes about 4 houres to complete and all needed is brute force of a hydraulic press. Paper gaskets - they are available in most cases (ALTYCO) but we soon found out it's cheaper and better to make those by copying the original. Sheets of gasket paper, cartboard, rubber, composite are available (EBAY). By the way, paper gaskets purchased from ALTYCO for the axles differentials do not fit ! Mention also, in most cases we used silicone on both sides of paper gasket too. Job done !

- 118 svar
-
- 1
-
-
Sugga #443
ämne svarade på Costin Mogas Costin Moga i Volvo Sugga/TP21/RAPTG 915/Volvo 912 och TL-varianterna
Well, having said so, body was send to bodyshop, and I forgot a while about it... Ok. Let's see: what have we here ? A bunch of parts - engine, gearbox, transfer case, axles, drive shafts, not to mention all bits and pieces nicelly labelled in boxes. So what to start with ? Have to mention rush was to commence work on the body as this is usually the most time-consumer. Where to start ? With what's in the way and seams easyer in order to clear space and put restored parts in the back. Gearbox we thought (I say we as I wasn't at any time alone in this, beeing helped by a friend of mine and later on by a very skilfull old-school mechanic). I have to mention there was always a delay between starting a job and putting all together due to ordering parts. Logistics proved to be the most difficult part in this restoration. If you think mechanics or metal sheet work is difficult, think twice ! Operations ofenetly overlapped, and work was started on other assemblies while parts were ordered and shipped. It was at all times a struggle to move assemblies (do you have an ideea of how heavy the axles are ?) and get space for work. Therefore, we thought, let's start the easy bits, finish them and clear the way. Gearbox.- 118 svar
-
- 3
-
-
Sugga #443
ämne svarade på Costin Mogas Costin Moga i Volvo Sugga/TP21/RAPTG 915/Volvo 912 och TL-varianterna
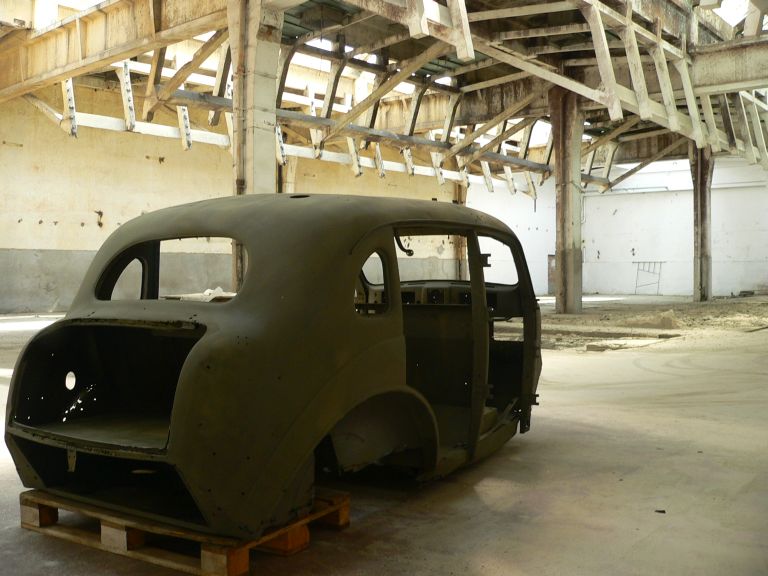
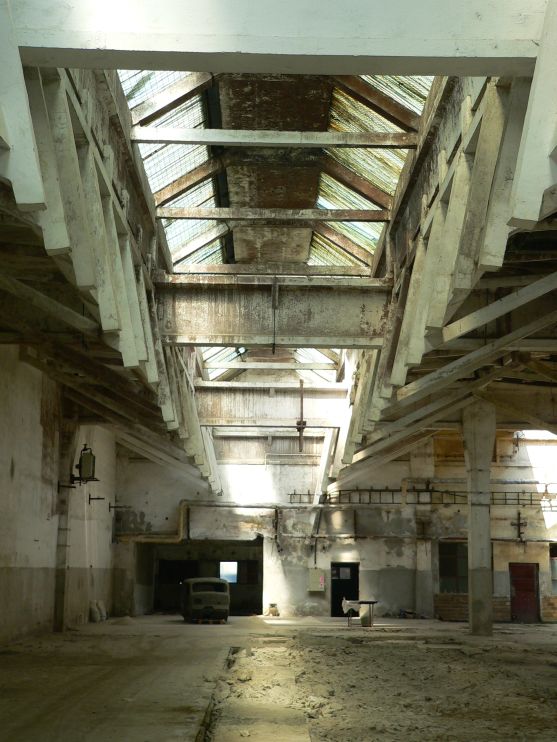
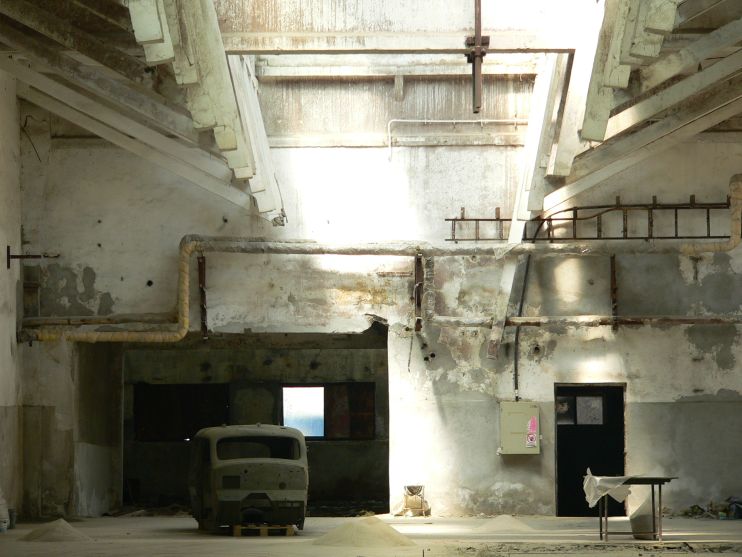
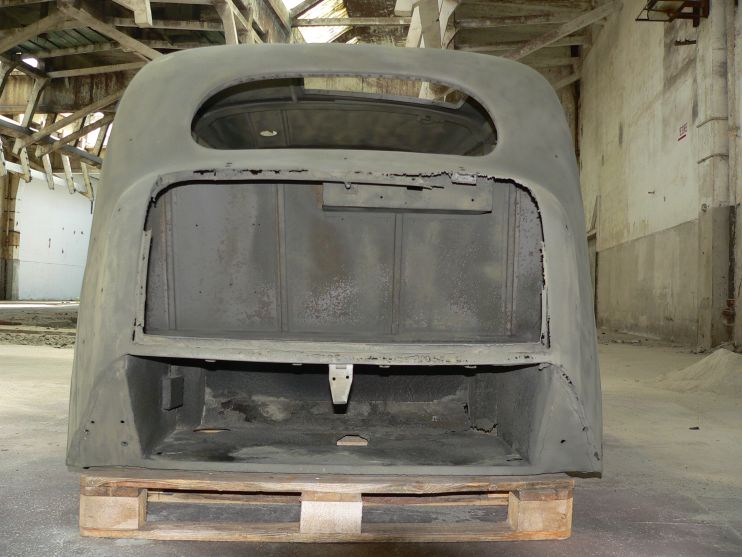
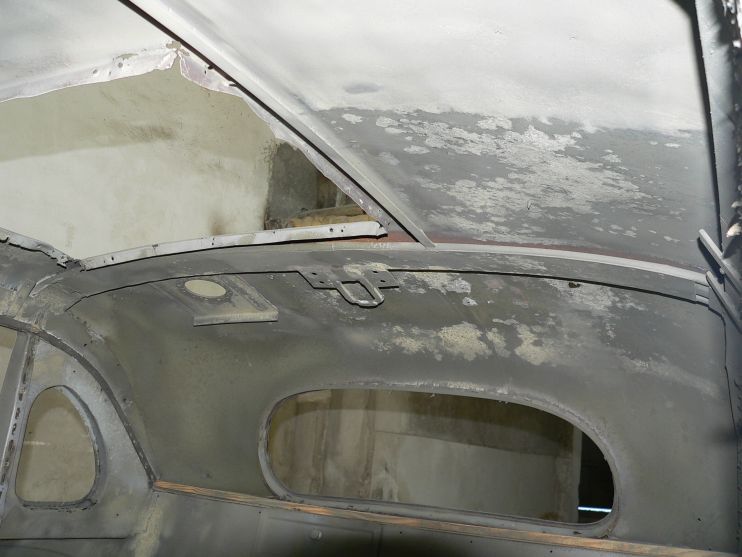
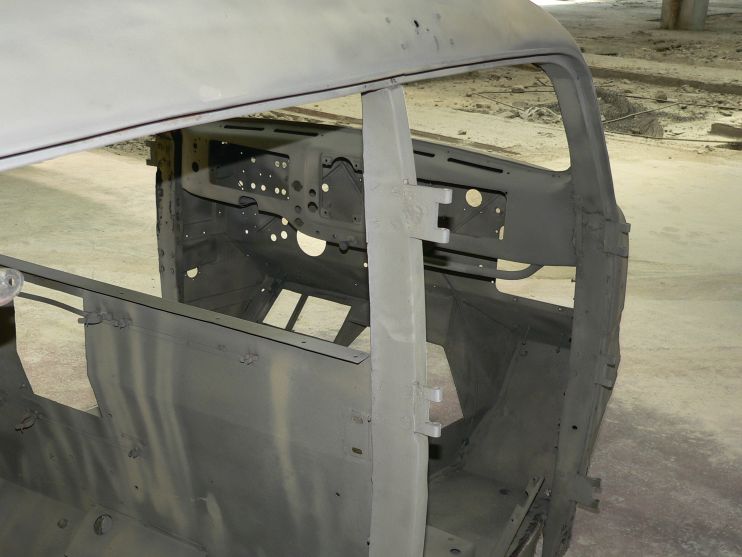
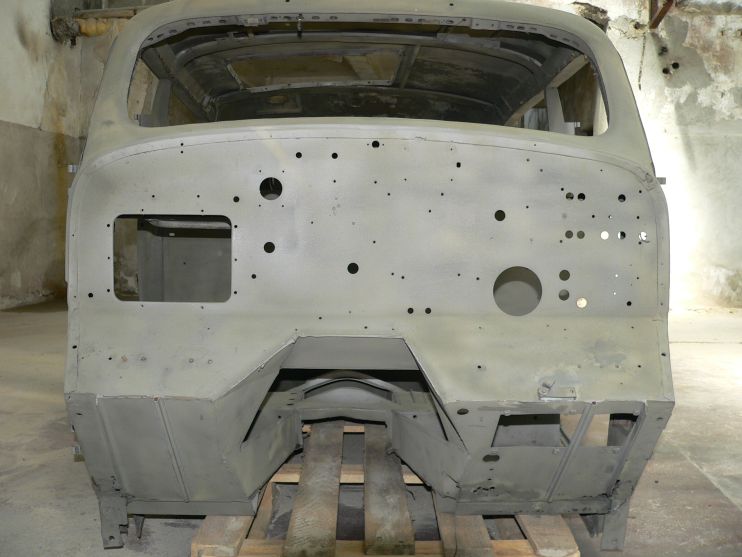
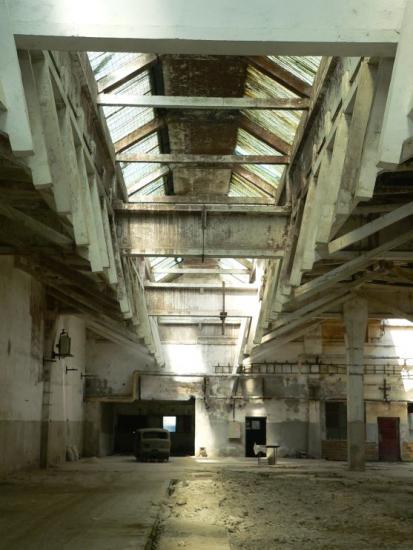
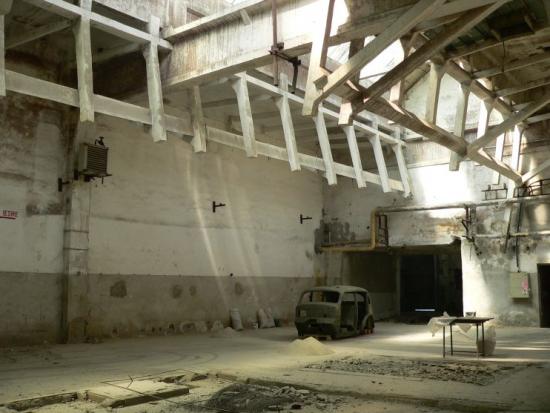
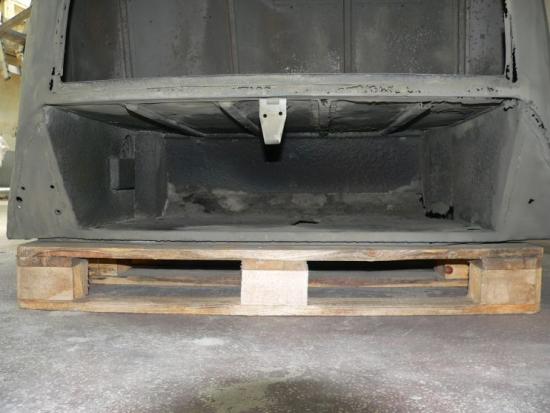
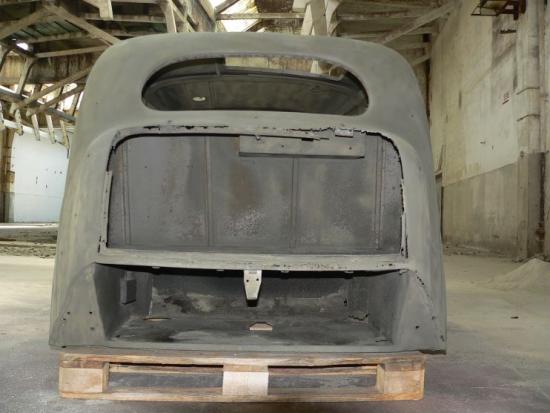
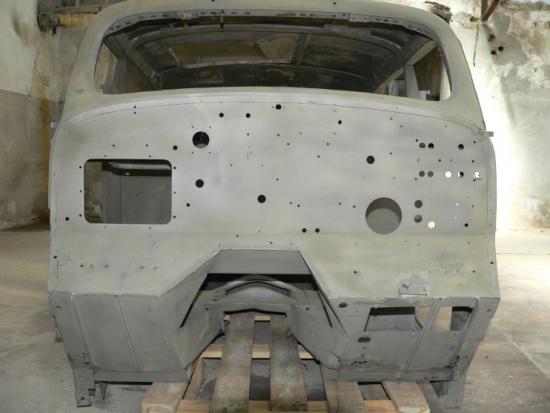
SANDBLASTING I'll finish with some dramatic images showing the interior of the old factory where the Sugga body was blasted.

- 118 svar
-
- 8
-
-
Sugga #443
ämne svarade på Costin Mogas Costin Moga i Volvo Sugga/TP21/RAPTG 915/Volvo 912 och TL-varianterna
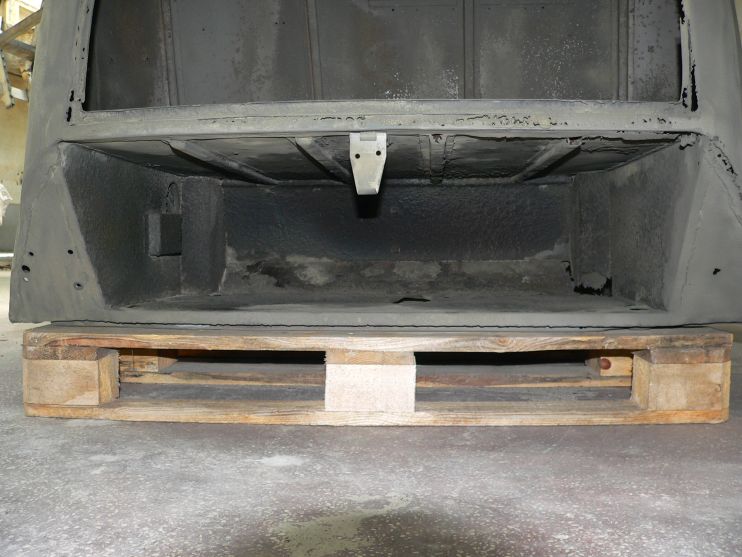
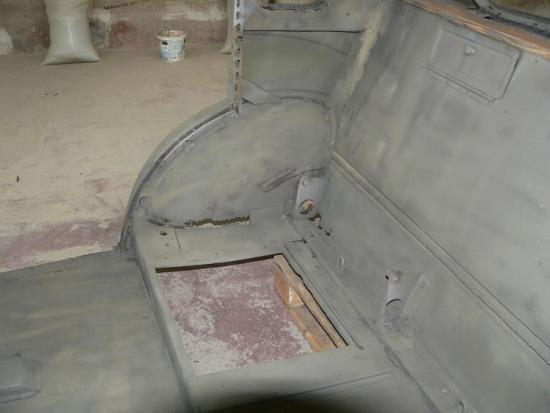
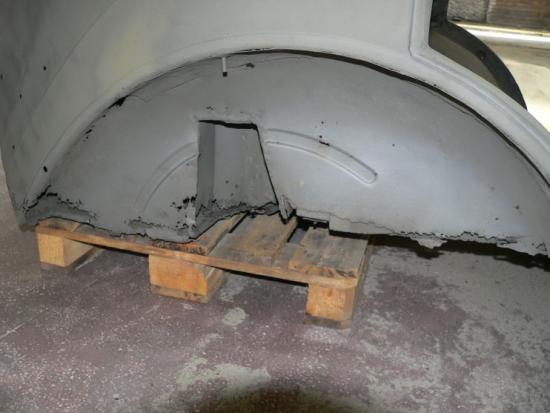
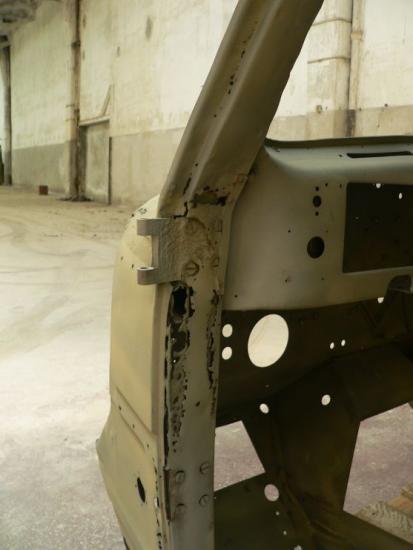
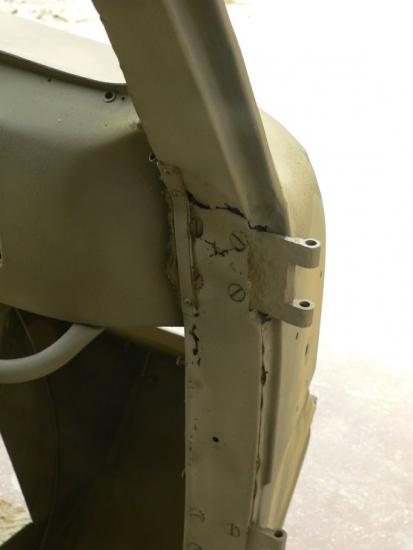
SANDBLASTING I've posted more than enough pictures, not to annoy everyone but this is one oportunity to see what's 'underneath'. To see how a Sugga looks like to bare skin. The places where it was mostly deteriorated are: - door pillars - trunk This is where one Sugga owner should look and care after.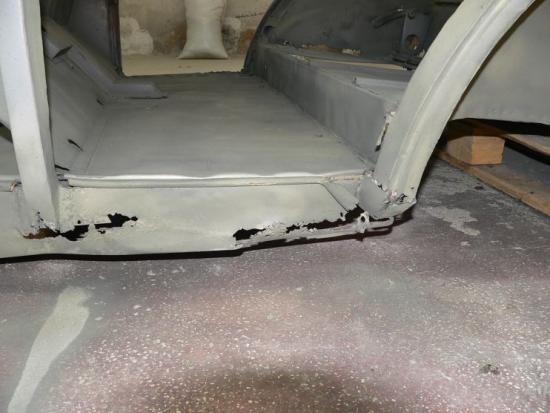


- 118 svar
-
- 2
-